Rustico brötchen

Montag, 20. November 2017
2x Brötchen "Rustico" mit Kürbiskernen - glutenfrei-
Meine 1sten Brötchen (glutenfrei) gab es zu einer Frühstückseinladung und die wurden nicht nur von der lieben Freundin (lebt/muss glutenfrei) sonder auch von meiner Familie sehr gerne genommen und auch wirklich gelobt. Geschmacklich super und frisch aus dem Ofen waren sie ganz großartig fand ich auch ohne Eigenlob. Das Mehl hier ist "Mix it Dunkel" von Schär, eine Mischung mit Leinsamen und Buchweizen das ergänzt wurde von mir mit feinen Kürbiskernen (gehakt).

Rezept für meine 1.Version mit Hefewasser und Hefevorteig.
Am Tag vor dem Backtag:

200 ml Hefewasser.
20 gr. Mix It Dunkel und
400 gr. Hefewasser-Vorteig
55 gr. Hefe-Vorteig
50 ml Wasser mit
10 gr. Frischhefe angerührt.
100 ml Wasser lauwarm
1 geh. TL Meersalz
1 TL Fenchelsamen (vorher angeröstet und gemörsert)
250 gr. Mix-It-Dunkel (Schär)(Werbung)
30 gr. Maisstärke
Für später und die Form
30 gr. Butter zum bepinseln und für die Form
50 gr. fein gehakte Kürbiskerne

Die Zutaten in einer großen Backschüssel (bei mir KitchenAid mit Flachrührer) mindestens 4 Minuten rühren damit ein glatter Teig entsteht, der sich vom Rand löst. Der Teig ist pappig geht aber. Diesen Teig habe ich nochmal 1 Stunde im Backofen bei 35°C, abgedeckt gehen lassen.
Danach war er gegangen.
Die Brötchen habe ich in einer Form gebacken weil ich mir nicht sicher war ob sie beim Backen auseinander gehen, haben sich aber gut in Form gehalten.
Gebacken im vorgeheizten Backofen 2 Schiene von unten 5 Minuten bei 240°C, mit viel Dampf, dann runter gestellt auf 210°C und weiter gebacken 25 Minuten, bis sie hohl geklungen haben beim Klopfen :) und eine schöne Kruste hatten.

Aufgeschnitten sehen sie so aus:


Und sie schmecken :).

200 gr. "Mix It Dunkel" mit 200 Apfelsaft verrührt/geknetet und 2 Stunden stehen gelassen.
50ml Sahne mit 100 ml warmen Wasser vermischt
2 El Bio Rapsöl
1 TL gemahlener Fenchel (geht auch mit Kümmel) wir mögen Fenchel sehr gerne und der passt auch.
260 gr. Mix It Dunkel von Schär
1 Päckchen Weinstein-Backpulver (7 gr.)
50 gr. Kürbiskerne fein gehakt.
Den Backofen auf 230°C vorgeheizt
In der Zwischenzeit die Brötchen geformt, auch dieses mal wieder bei mir in der Form gebacken, geht auch ohne. Das Formen habe ich mit nassen Hände gemacht ähnlich wie Klösse und dann die Teiglinge in den gehakten Kürbiskernen gewälzt, etwas flach gedrückt und mit flüssiger Butter beträufelt, das auch nochmal 5 Minuten vor Ende der Backzeit.
Gebacken 5 Minuten bei 230°C, runtergeschaltet auf 200°C und 25 Minuten weiter gebacken.


Keine Kommentare :
Kommentar veröffentlichen

Empfohlener Beitrag
Süsswein-Birnen mit Streusel-Windbeutel

Beliebte Posts


Blog-Archiv
- ▼ 2017 (22)
- ▼ November (3)
- 2x Brötchen "Rustico" mit Kürbiskernen - glutenf.
- Spontanes Apfeldessert am Sonntag
- Synchronbacken November 2017 und Panettone
- ► Oktober (5)
- ► September (2)
- ► August (7)
- ► Juni (2)
- ► März (2)
- ► Januar (1)
- ▼ November (3)
- ► 2016 (66)
- ► Dezember (3)
- ► November (3)
- ► Oktober (1)
- ► September (5)
- ► August (9)
- ► Juli (7)
- ► Juni (2)
- ► Mai (4)
- ► April (7)
- ► März (11)
- ► Februar (10)
- ► Januar (4)
- ► 2015 (60)
- ► Dezember (14)
- ► November (14)
- ► Oktober (13)
- ► September (11)
- ► August (8)
- ► 2013 (132)
- ► November (12)
- ► Oktober (16)
- ► September (17)
- ► August (15)
- ► Juli (15)
- ► Juni (7)
- ► April (3)
- ► März (14)
- ► Februar (18)
- ► Januar (15)
- ► 2012 (66)
- ► Dezember (10)
- ► November (13)
- ► Oktober (14)
- ► September (16)
- ► August (13)
https://www.instagram.com/auchwas/
-FOOD-"VANDENANDEREN"
Zimt, Vanille, Sternanis & Glühweingewürz
Rustic Bread

Rustic Bread

I've made two batches of the Rustic Bread from Jeffrey Hamelman's Bread: A Baker's Book of Techniques and Recipes and they have turned out excellent. Pretty, too: for once my loaves are decently shaped. I'm not sure it is has so much to do with the recipe or just that, after 4 months of constant baking, I'm starting to get pretty good at this.
I love the simplicity of this one: 2 lbs flour, 1 tablespoon salt, just over 1/2 teaspoon yeast, and enough water to hydrate it all. It still amazes me how the best bread is made with the fewest ingredients.
I want to do a lesson on shaping soon, as well as one on pre-ferments. So I'm not going to cover those steps in the level of detail I should here, but I'll get enough of the recipe down that most people shouldn't have trouble following it.
Makes 2 large loaves
1 lb. bread flour (3 1/2 cups)
9.5 oz. water (1 1/4 cups)
1/2 tablespoon salt
1/8 teaspoon instant yeast
10 oz. bread flour (2 1/2 cups)
6 oz. whole wheat or rye flour or a mixture of them (around 1 1/2 cups)
12.5 oz. water (1 1/2 cups)
1/2 tablespoon salt
1/2 teaspoon instant yeast
all of the preferment
Put the yeast in the water and stir. Mix the flour and salt together in a bowl and pour in the yeasted water. Mix until the flour is hydrated, adding more water if necessary. Cover the bowl with plastic wrap and leave the pre-ferment out at room temperature overnight (up to 16 hours. if you need more time before baking put it in the refrigerator).
To make the final dough, combine all of the ingredients except the pre-ferment in a mixing bowl. Chop the pre-ferment up into small pieces and mix or knead it into the final dough until they are thoroughly combined. This is quite difficult to do by hand: Hamelman assumes the baker has a mixer and can mix it for 5 minutes by machine. I mix and knead my dough by hand for about 10 minutes. At the end of that time the new and old dough aren't perfectly combined-- you can still see a few streaks of the lighter colored pre-ferment in it-- but they are sufficiently combined that loaves bake evenly.
Place the dough back in a greased bowl and ferment for 2 1/2 hours, punching down or folding the dough twice during that time.
(Folding the dough consists of taking the dough out of the bowl, spreading it out a little on a clean surface, folding it in thirds like a letter, rotating it 90 degrees and folding it up again, and then returning the dough to the bowl and covering it again. Like punching down, folding degases the dough some, but it also encourages gluten development. More on this topic in a future post.)
At the end of the fermentation, divide the dough into two pieces and preshape each into a ball. Cover with a clean towel and let each rest for 5 to 10 minutes before shaping into the final shape. Once shaped, cover the loaves with a clean towel and set aside for a final rise, approximately 1 1/4 to 1 1/2 hours.
Halfway though the final rise, begin preheating the oven to 450 degrees. If you are using a baking stone, preheat it as well.
Right before placing it in the oven, score the loaves. Place them in the oven and use whatever technique you use to create stream in the oven (squirt bottle, skillet full of hot water, etc) to encourage proper crust development.
After 20 minutes of baking, rotate the loaves 180 degrees so that they'll bake evenly. Bake until an instant read thermometer reads around 200 degrees, which took approximately 35 minutes for my batard ("football") shaped loaves.


- Log in or register to post comments
- Printer-friendly version

Looks really , really good. :-)))) qahtan
- Log in or register to post comments
I still haven't bought a scale so having dry measurements is so helpful. Looking forward to baking this rustic bread this weekend.
- Log in or register to post comments
I too tried this recipe this past w/e. Used the 'no-knead' method. The bread turned out awesome. I used a high hydration percentage on my loaf. The crumb was similar to ciabatta. The oven spring was extraordinary. The flavor was excelllent. Looking forward to trying my Challah bread this w/e. Used the no-knead method on this one also. Then froze the loaves before shaping and final rise. I'll take two out of the freezer on Thursday. Put them in the refrigerator and shape, proof, and bake on Friday for Saturday's oneg.
- Log in or register to post comments
I am in heaven. now that I've found this great site. My initial thought, when I came upon the picture of the Rustic Bread was : "Oh My. What a lovely loaf !".
The preferment is already put together. And my plan is to try baking this one tomorrow.
I have a question about mixing/blending the preferment with the dry the ingredients. I don't have a stand mixer and have rheumatoid arthritis in my hands. Could one blend the preferment with the 12.5 oz. of water first? Then once it is dissolved. add the remaining ingredients ? I'm thinking this would eliminate the difficulty of incorporating it with the rest of the ingredients.
- Log in or register to post comments

I don't see why that wouldn't work, but I haven't tried it. Please let us know how it works out.
- Log in or register to post comments

No reason not to mix the preferment with the water before adding dry ingredients. That is how Reinhart suggests doing it in artisan breads every day and how Robertson does it in Tartine Bread.
Hammelman must be trying to sell mixers :)
- Log in or register to post comments
Check out my post re kneading bread. Try it and let's know if helps you.
- Log in or register to post comments
So far. so good. The preferment dissolved nicely in the water and the remaining ingredients incorporated easily. Had to set the loaves in the oven on the proofing cycle because it is quite cold here today..
Can't wait to see the results.
- Log in or register to post comments
I did something similar- I didn't start mixing the dough until I had the preferment in it. So basically used the preferment as an ingredient and mixed it in. I did not find it difficult at all to mix it in (but of course, I don't have arthritis). But there were no streaks at the end. So I think at the very least it would be easier than mixing them separately. Perhaps something will be lost- I'll let you know. I'm baking now.
- Log in or register to post comments
I always have difficulty mixing the dry and wet ingredients. I followed the recipe exactly but I keep getting a very sticky dough that I had to keep adding more flour and end up working with the dough for quite a long time.
- Log in or register to post comments
Has anyone attempted this beauty? It looks like a wonderful Holiday goodie. Any pointers before I dive in would be a help.
- Log in or register to post comments
You are talking about one of these?

No, I haven't baked one. Maybe I'll try it this weekend.
This rustic bread recipe has become one of my standards. I bake this almost every weekend, alternating with the pain sur poolish. Pretty similar except the pain sur poolish is white flour only.
Amazing how difficult it is to make a really good French bread.
- Log in or register to post comments
I have tried this recipe out and it did turn out great. I'm not exactly the best bread maker myself, but I am getting better at it. Some advice would be to get the ingredients exactly perfect. Even small differences have thrown off the whole loaf.
- Log in or register to post comments
I just baked this bread today. It is so incredibly easy and YUMMY. Just follow the instructions and you can not go wrong. I have not baked bread in 20 years and I was worried needlessly. I am so glad I came upon this sight. : >
- Log in or register to post comments

huh? Couronne? Are you talking about the bread image at the top, which Floyd baked and I ate ;)
or is couronne another bread-type and this question got misplaced in this forum topic? Google isnt even showing me any meaningful results. it's a crown in french. uh.
- Log in or register to post comments
Yes this looks more like Peter Reinhart's rendition.I recently saw this bread made by Steven Sullivan (Acme Bread Co.)on PBS Episode #110 of the Baking With Julia Series. It was a incredible demonstration. He made a chain made out of a thin log of dough placed in the bottom of the form. This then became like jewels on the top of the crownrather than creasing the top into 4 quadrants (BBAp75).
- Log in or register to post comments
Huh. This weekend I tried using the rustic dough to make a Courrone in the way that Peter describes. It wasn't very pretty, but the bread was wonderful!
- Log in or register to post comments
I think I'll give it a try since I'm having much better crust and oven spring with the new Old Stone Oven baking deck.
Floyd does the open hole in the center reduce baking time?
- Log in or register to post comments
Hmm. I'm trying to remember. I think it definitely took less time to bake than a large, football loaf, something closer to the amount of time it takes to bake baguettes. I didn't watch the clock closely (I just eyeballed it and did the tap on the bottom). I'd guess mine baked around 25 to 30 minutes at 450 or 460.
- Log in or register to post comments
Can someone help me with Ciabatta I'v tried to make this bread about 6 times and everytime I make it there is NOT ENOUGH LARGE HOLES in the bread. the dough is very soupy lots of water what am i doing wrong HELP
- Log in or register to post comments
Try using about 70-75% water to flour and use the strongest bread flour you can find. I buy 25# bags of ConAgra bread flour at Costco, which works just fine, and I add about 5% coarse-ground whole wheat flour, which I think gives better flavor. I also use a wet pre-ferment that has approximately the same flour-water proportions, plus 1/2 tsp or so of active dry yeast (which I hydrate before adding).
The key, I think, is to knead for a long time . usually 10-12 minutes at low speed on my Kitchen Aid, then turn it out onto a heavily floured work surface. I also stretch and fold the dough 2-3 times over 2 hours or so, then form my loaves and put them onto individual pieces of oiled and semolina'ed parchment paper. I let them proof en couche and bake them on a stone using Reinhart's hearth-baking technique (preheat to 550F with steam pan, add steam over the next 2-3 minutes, then turn the oven down to 450 and bake for 20 minutes or so). I've also found that spritzing the loaves with water before I bake them gives me a much thicker, chewier crust.
So far, I've had very good success with this method . in fact, of all the breads I make, my wife likes this one best.
- Log in or register to post comments
Another thing that helps with the large holes is to be careful not to degass. In other words, don't knead after the first time. As it doubles, just fold it over lightly a couple of times and let rise, again. Don't press hard on the dough. What makes for good holes is wet dough and light handling.
- Log in or register to post comments
You mention Jeffrey Hamelman's book of techniques and recipes. Is it strong on techniques; does it have good photos showing the techniques? I'm a visual learner.
I really emjoy this site. Keep up the good work.
- Log in or register to post comments
Hamelman's book has no photos. There are some decent line drawings that could help you a bit, but overall it is quite text heavy.
- Log in or register to post comments
Floyd is right the book is text heavy but if you read through thr recipes carefully the book is quite helpful.
- Log in or register to post comments
There are a number of Jeffrey Hamelman videos on Youtube. Go there and search Hamelman and I you just might find what you're looking for. If not with Hamelman, there are any number of videos on aspects of bread making.
- Log in or register to post comments
Interesting - that is the first recipe I have seen with salt in the preferment. I take it that does not kill the yeast too early?
- Log in or register to post comments
No, it doesn't seem to kill the yeast.
I think it is supposed to be more of a pate fermentee than a poolish, so it is more like a complete dough than a sponge.
- Log in or register to post comments

I'm glad someone also had a question about salt in the preferment. I'm relatively new to making artisan breads at home (just 3 months into it and totally obsessed). Everything I've read has cautioned against salt at this early stage, so it's really interesting to learn about your outstanding success. Something new to try!
In search of the perfect crust & crumb
- Log in or register to post comments
My first attempt at rustic bread turned out well despite a few deviations from the recipe (about a tablespoon extra water and a 16 hour ferment time before refrigeration overnight and forgetting to put salt in the final dough). I just have to salt each piece of bread before I eat it :-). Thank you for the wonderful, forgiving recipe.
I had difficulty with the shaping though; the dough was pretty soft and I do not have a couche or a banneton or that piece of wood for transferring the loaf from a couche to a peel; moving the slack dough from the proof station to the peel was nearly disastrous. I am thinking of proofing and baking it in the future on the "perforated french bread baguette pan" from Chicago Metallic
Does anybody have experience with this? I am trying to spend money that will make a difference, not just spend money; the pan is $20.00. I have also ordered a 60" by 36" piece of #10 cotton duck canvas for 11.00, including shipping, from www.ahh.biz to serve as a couche.
Anyway, thanks for helping me bring the best bread I have ever baked into my house, shaped like a corkscrew and undersalted, but otherwise beautiful, delicious, and with a wonderful texture.
- Log in or register to post comments
I mentioned this before on my own blog, but it bares repeating. I purchased a two loaf pan at a kitchen outlet store in a Tanger outlet mall in Fort Myers, Florida. It is silvery, plated with some type of metal, and the surface is somewhat rough. I have used it 5 times and have had no major sticking problems. It cost $3.00. These types of generic kitchen stores can be found in Tanger and other outlet malls.
- Log in or register to post comments
I had actually thought about getting some of these to increase the ease of baking baguettes. The Hamelman book actually has a pretty nice series of photographs showing crust and crumb of baguettes made different ways. These make it look like the pan sort of confines the oven spring, reducing the size of the holes, and changing the shape of the slashes. Have you noticed anything along these lines?
- Log in or register to post comments
I have the two-loaf perforated Chicago Metallic french bread pan. It works well for me. I have read much advice the one should only bake rustic bread directly on the stone, and not in a pan, but it seems to work and it does provide the support for the wet dough that you are seeking. The bottom of the loaf stays golden rather than turning dark brown, but as much as I like dark crust I think that contrast is a good thing.
- Log in or register to post comments
I agree with Nancy - wet dough, light handling . It is amzaing how just folding increases the strength and elasticity of the dough.
The old fashioned idea of "knock the hell out of it" is just so wrong.
- Log in or register to post comments
The dough for my 4th version of rustic bread is now fermenting. My first try was shaped the best, but I mismeasured salt and perhaps the water. The next 2 tries I measured very carefully, doublechecking, verifying. The dough was a batter, I literally had to pour it onto the baking tiles. So this time (some weeks later) I didn't immediately put all water for the final dough into the stand mixer bowl; I added it slowly during the mixing process.
After mixing slowly while adding the water, I had a dough that barely came away from the mixer bowl, very sticky, with the splat-splat sound of sticky dough splashing against the mixer bowl just eliminated.
There was 3 7-8 ounces (i.e. almost 4 ounces) of water held back. I will proceed with the fermentation, folding, proofing, shaping, etc, and post my results.
After the April budget crunch in my household passes, I think I will also buy the Hamelman Techniques book, to see what he says about the texture of the dough after mixing. I loved the flavor of my 1 inch high bread that I poured onto the tiles, but I'd like it even better in the shape of a loaf :-).
- Log in or register to post comments
Well, I think the bread needed the extra water after all; the crumb had very tiny holes, and folding the dough was difficult.
I found the relevant Hamelman book chapter on line
and saw a few details about the mixing and shaping that I didn't fully appreciate before.
All in all, I like this bread a lot, and appreciate the suggestion by someone (Floyd?) to work a single recipe over and over and see the effects of varying the processes and ingredients.
Thank you for the opportunity to learn and share here.
- Log in or register to post comments
I am trying to make the bread. but am having a very difficult time "Folding" the bread. I can't even pick the bread up it is so slack. I can tell the gluten has developed well when I stretch it with my fingers to a very thin window. To fold the dough I just picked up one side and stretched it over the other side several times. I saw no holes in the bread like I was expecting. I was excited to see that the preferment had nice sized holes, but am not seeing the holes in the "Rustic Loaf" when folding??(yet) Seems like the recipe was ease to follow. but not seeing the best results yet.
ahhhhhh. and another thing. I totally miscalculated the time line of the bread. and I am bush wacked tonight and need to go to bed. I put the bread in the refer for the night after the 2.5hrs rise time and plan on letting the bread raise tomorrow night before baking. this gunna be ok??
- Log in or register to post comments
Can I go from the refridgerator to the oven?? with this bread??
- Log in or register to post comments
I often go from the fridge to the oven. No need to let the cold dough heat up. Just put it in the very hot oven, steam it and it bakes very nicely.
- Log in or register to post comments
I shared a recipe with a friend and she questions making bread w/o any sugar in the recipe to feed the yeast. It was the Rustic bread recipe. I've been making it w/o sugar but my wife added some sugar while making the recipe and hers did seem to raise higher than mine. Any opinions on adding sugar either way?
- Log in or register to post comments
Sugar is, for yeast as well as us, basically junk food.
There are complex sugars (maltose) in wheat flour that yeast breaks down into simple sugars (glucose). If you add much table sugar to your bread, the yeast will stick to feeding on it, a simple sugar, rather than go do the hard work of breaking down the maltose. So you'll get fermentation, which releases gas and leads to a good rise, but you won't necessarily get the flavor you get as a result of break down of the maltose.
So when are trying to make a bread like this, where the flavor really comes from the wheat, most bakers suggest adding minimal (or no) sugar. If you are baking a bread where the flavor comes from the other ingredients and you don't really want a wheaty, nutty flavor, like, say, a sweet bread, adding sugar or honey is fine.
- Log in or register to post comments
Thanks for the clarification. Now I can tell my wife that although her's had risen quite well, my bread had a more complex wheaty flavor!
Still Trying to find a good loaf of bread in South Florida!
- Log in or register to post comments
I forgot to tell you thanks for posting such a great recipe. We haven't purchased any bread from over a month. We alternate between the Italian and Rustic recipes. I must admit that I use all white flour for the Rustic Bread.
Still Trying to find a good loaf of bread in South Florida!
- Log in or register to post comments
Panera's is just opening a store in the new Coconut Point mall in Fort Myers. I love their asiago bread.
- Log in or register to post comments
I once had a coupon for a free loaf of their Asiago Bread, and I loved the flavor. I've been meaning to try to duplicate it, but never got around to it. When they came out with a Panera cookbook, I thought, "Aha! Now I can get the recipe." Turns out the book only had recipes for using their bread, not to bake the breads themselves.
- Log in or register to post comments
The recipe for their asiago-parmesan-romano bread is posted on their Web site:
I made a batch for a friend's post-Thanksgiving dinner party, and it was a smash hit. It calls for a poolish starter, which I let develop overnight instead of the 30 minutes the recipe calls for, and I think that helped.
"I am not a cook. But I am sorta cooky."
- Log in or register to post comments
I just now found your message, and the bread sounds wonderful. Nice proportion of cheese!-Mary
- Log in or register to post comments
Thank you for sharing a fantastic recipe. The bread had the perfect texture and saltiness, and just the right crust. I'll be making this many more times in the future!
- Log in or register to post comments
I love your bread blog. My dad is an excellent baker and we have tried some of your recipes over the holidays. We made the rustic loaves for our Christmas dinner and everyone loved them! We also made Peter's cranberry walnut celebration bread. it is a great recipe as well. Thank you for all of your tips!
We are in the process of trying the cinnamon raisin oatmeal recipe. the dough is rising:) I will try to send pictures soon!
A question: What brand of thermometer do you use?? My dad needs a new one. Any recommendations? Thanks again!
- Log in or register to post comments
I have no idea what brand it is. The cheapest I could find, I think. It ran about 7 bucks and I have no complaints about it whatsoever.
- Log in or register to post comments

I began this loaf last night.
I mixed the preferment and it didnt seem to have anough water as the dough wasnt completely mixed so I added about an extra 1/2 to 3/4 of a cup of water. The dough still seemed too stiff but I left it. This morning I came out and saw that the preferment had more than doubled in size and I was relieved.
I mixed the final dough, and it didnt need all of the water or it would have been too slack. I kneeded it and left it for 45 mins. I then folded it and have timed it for an extra 45 mins. This is where I am up to now. I planed to fold it twice like the recipe says and decided that folding it at 45 min intervals in the beginning of the fermenting/rising period was a good idea so that it had the last hour untouched to rise.
My worry is that since mixing the final dough this morning, it hasnt risen much.It seems like its asleep :S
I am afraid that I;ll end up with a heavy bread. Is it just rising slowly becuase of the little amount of yeast in it? (until now I have been practicing my skils with lesson one and two, and felt confident enough to try something else) I'm due to fold it again in about half an hour. SO I will see how it goes.
- Log in or register to post comments
Is your house cold and/or was the water cold? That'll slow it down. Hamelman's times assume that after mixing the dough is around 76 degrees, which is much warmer than my house or dough right now.
It should rise slowly but, given time, rise (assuming your yeast is good). Find a slightly warmer place for it perhaps, like the cool oven with just the light on. And/or give it an extra 45 minutes between folds. Doubling the rise time may seem drastic, but it really isn't on a cool day.
- Log in or register to post comments
lol. I am in Australia. in midsummer! admittedly it has been a cool summer and my new place is cooler than most houses. I have it sitting on top of the oven and turn the oven on for 5 mins and then turn it off so that the kitchen is warmer.
I might stick it in with the light on. :) and I'll allow it an extra 45 mins between the next fold. DOes that mean after I fold it I still allow the last hour for it to rise? Sorry to sound daft. still pretty green at this baking thing :)
Thanks for your advcice floyd! It's very much appreciated :)
- Log in or register to post comments
That's right. I forgot where you are located.
If you know the yeast is good, then I say just sit back and give it time. It is disconcerting the first couple of times you bake a low-yeast bread because it does take so long, but the payoff is worth it. Sourdough is even more painful: even with an active starter, it isn't unusual for it to take a dough 3 or 4 hours to double in size.
Just sit back and let it do its thing.
- Log in or register to post comments
Thanks for the reassurance Floyd. Yeah the yeast is good. I made a basic loaf yesterday for breakfast today and it was great, so it is just me getting used to the slowness of low-yeast rising. At least I know now :)
It is going nicely at the moment. I'm due to fold it again in about 20mins, and am going to wait and be patient and let it do its thing. I cant wait to taste this one :D
- Log in or register to post comments
ooooohhhhhhh I have two very lovely looking loaves in the oven :)
fingers crossed XX :D
- Log in or register to post comments
Apart from burning the crusts a bit the bread turnedout deeeelishious! I am sitting here eating a still warm slice. :) The crum is lovely and the taste is morish! This is going to become my regular bread recipe for a while :)
Thanks for all your help Floyd :)
They rose nicely and it took maybe an extra hour on top of the alotted time in the recipe. I was also impatient, so if I had have waited longer I am sure it would have been even better :)
Yay! for my ever improving bread baking skills. I will be able to make use of my Xmas pressie soon :D (I got BBA for Xmas)
- Log in or register to post comments
I received the large, bell shaped Le Clouch for Xmas, and I decided to use this recipe for a comparitive test. I used the quantities listed above, but mixed all at one time to use the Kneadless method. The only change that I made was to use 1/2 tsp yeast. After mixing, the dough sat at RT for 18 hours. At that time, I roughly divided it into two halves.
The first half, I envelope folded, let sit for 30 minutes, and formed it into a ball.
The instructions that come with the clouch say to put the ball into the bottom of the clouch, cover with the cold bell, and let rise till doubled. Then put it in a 450 oven for 15 min., then reduce to 400 for another 15 min., remove the cover and bake for another 10 min. or so. I followed these instructions exactly, except after 1 hr. rising, it was only about 1 1/2 original size, but because it was spreading out, I put it in the oven at this point.
The results seemed excellent. I got a golden loaf more than 2 times the size of the original ball. Coming out of the oven, it had a thin, crispy crust, but unfortunately, after it cooled, all of the crust became soft, except for the bottom, which had been on the stone bottom. The crumb was very nice, with some medium sized (1/4-3/8") large holes, and the taste was excellent.
The second batch had to be refrigerated for 5 hours or so, and after a 1 hour warmup, was prepared like the first one, but it was risen in a linen lined basket. My normal, flat stone and the top of the clouch were put in the 500 oven for 1 hour.
Once again, I didn't get a lot of rise in the basket. I removed the hot bell, spread some corn meal on the stone, plopped the ball on it, and covered with the bell. After 20 minutes the temp was reduced to 450, and 10 minutes later I removed the bell. 10 minutes later, the inside was 205 and I pulled it from the oven.
The loaf was 3-4 times its original size, had a hard, crispy crust, and many more of the 1/4-3/8" holes. After 10 hours, the crust is still crispy. The taste of the two loaves seem equivalent to my 69 year old palate.
Using this bell is much easier than using a pot and lid, IMHO.
- Log in or register to post comments
I got some unexpected results since posting the previous comments. After baking one loaf in a hot clouch and the other in a cold clouch, I sliced them up and froze them for use as my morning toast. The bread from the hot clouch becomes dry and crisp, with a thick crust. The bread from the cold clouch comes out of the toaster with a delightful thin, crisp crust, but the crumb comes out soft and chewy even when toasted fairly dark, just the way I like it.
- Log in or register to post comments
Here is the report on my sourdough rye. I ended up retarding it in the refrigerator last night till this morning. I took it out and let it come to room temp. I decided that I wanted a sorta batard versus a boule so I let it rise in my oval banneton. It rose nicely over 4 hours. I tipped it onto the peel to put it in the oven and the loaf deflated a bit. I was disappointed and I think it happened because it stuck to the banneton. I had floured it well beforehand and it still did not come out easily. I slashed it and baked it and did not get too much oven rise. The bread is wonderful tasting but it is definately a little deflated. I am disappointed with the end looking results but will keep working at it. One of the good things about poor looking outcomes is that they still eat very well. Any suggestions on preventing this type of problem? All suggestions appreciated.
Rena in Delaware
- Log in or register to post comments
This has become my daily bread. (though I make it and freeze one loaf)
Yesterday I made this batch into 4 small loaves.
I had to go shopping and left the dough to rise. I took longer than I expected, so 3 hours later I came home to find my dough spreading all over the place! Over the sides of the baking tray I had it on!
I quickly folded it up and left it to rise again. 20 mins later it was pretty big again, si I folded it again and left it for another 20-30mins. I cut it into 4 and let them rest then chaped them. it was like the beasties were having a frenzy. They rose so well!
I then slashed them. and they were good slashes! Nice and deep, Once they were put in the oven, I got a huge oven rise out of them. I dont normally get an oven rise.
They taste delicious!
Is the secret to my success neglect of the dough ;)
- Log in or register to post comments
That looks awesome. I have made a few rustics over the last few weeks..Good..But hey, if we all would settle for "good" the local market would be the fix..Right. Serious question..On this particular bread..Is a preferment . uhhhh, crucial. Or am I disposing this step in the manner of asking a saumari why he would go through so much" trouble" to have a sword's blade folded 2,ooo times. My 3 earlier loaves, I used a straight build with all ingrediants, to a 18 minute hand knead-trying to keep it "rustic" and rock it in a old school manner-as I "eye" that groovy, shiny $9 gazzilion mixer that sits on my counter ..I keep telling myself. "Mixer. Not. The. Way. They would have..Done..It. Back in the day..". I am probably going to do the next loaf as per Floydm's rec. As I put my hand to my head and close my eyes. A hazy vision premenses why my loaves don't have that "heaviness" or the sexy air pockets. Thanks in advance, and please feel free to slap my forehead ..I take few things serious. Fly fishing and baking. Different story.
- Log in or register to post comments
I think if you try it with the preferment you'll find it produces a more complex, better tasting loaf. But, no, you don't *have* to do the preferment stage, and if you are going to gobble it down right out of the oven or smear it with something that'll overwhelm it (like a strong cheese) you probably won't notice much of a difference.
- Log in or register to post comments
Notes from the counter-top. Over the last 24 hours, I baked 4 loaves of the above rustic.
-Preferment-Added "weight", depth and complexity in texture and taste. Earlier "non" pref's where more "white bread"-albiet, political posture. insert lame smiley icon. Earlier loaves were light in regard to density, taste, and texture..Last loaves had a crust that you could break bad teeth-desired. Interior was euphorically pockted, airy and springy. Summary. Side notes..Attention paid to static temperatures of all dry ingredients and bowls-warrented explanation. My wife is ingrained with Alabama folklore/urban myth that ALL flour,sugar, cereal products MUST be put in a refrigerator to protect "said" items biblical plagues of "weevils",locust,cicada, and the elusive doodle bug. Short-I believe that I was retarding my yeast growth and overall development of my breads by starting with flours that temperature wise was too cool..Also, I listened to the 'Archers of Loaf" this time. Last time..Graham Parsons..I believe the "Archers" inhibited a better baking enviroment. Today is a pretzal day and a field study on the effects of 1 pound of rising doughs density on a 3 year old stomach. Baby Jack decided to eat ALL that he assisted with. Floyd.."Seriously"..Thank you.
- Log in or register to post comments
I used this rustic loaf as a base for some jalapeno cheese bred today. It came out great!
- Log in or register to post comments
I was curious to learn at what point you added the jalapeno and cheese to the recipe?
- Log in or register to post comments
I chop the jalapeno's and crumble the cheese during the rise. I try to remove excess moisture from the peppers. I add it all in on the final fold of the dough before shaping so it gets layered throughout the loaf without having to knead it in.
- Log in or register to post comments

Que bueno! Rustic bread is one of my favorites; you've improved on a very good thing, and I'll be borrowing your idea one of these times.
- Log in or register to post comments
I tried this recipe yesterday, after great results with the ciabatta recipe in BBA. I was hoping to get something like a ciabatta, but with more whole wheat flour. It was kind of a flop. To wit:
- The crumb was fairly dense, nothing like the open crumb a rustic bread should have.
- The dough was too slack to shape, so the final loaf looked like an oblong pancake.
I used King Arthur AP flour and Bob's Red Mill Whole Wheat. I followed the recipe as given, except that I allowed about an hour extra rise time because the gluten didn't seem to be developing much at all.
Any suggestions as to what may have gone wrong?
- Log in or register to post comments
I make this all the time and I love it.
the only thing I can suggest is mabe the wholewheat flour needed a little help with the gluten? I find I cant make wholewheat bread with out some gluten added or else it flops and is dense.
Tis may be it, but it may not be it at all.
sorry, its a suggestion though.
have I confused you enough?
- Log in or register to post comments

You need the Laurel's Kitchen Bread Book. It's all whole grain and no added gluten. Her secret is plenty of kneading to develop the gluten. I made her Buttermilk Bread yesterday kneading briefly in my Kitchenaid; then I switched to Stretch & Fold, with 4-5 of those. It's fabulous!
- Log in or register to post comments
I didn't try adding gluten, since neither floydm nor Hamelman made any mention of it. How much of the stuff do you add when making this bread?
- Log in or register to post comments
You can try what rosalie said or I add 1-2 tablespoons gluten flour per cup of flour.
I also have been doing half whole wheat and half white unbleached. but now I am doing 100 percent whole wheat but sifting half. Its quite nice.
All I can suggest is try different techniques out. what ever works for you is what you stick with. :)
- Log in or register to post comments
Tried the Rustic Bread recipe this weekend. I scaled it down to one loaf. It works pretty much as described. Mixing preferment into dough is quite a bit of work, so is first folding - the dough is much to soft and sticky at this point. Second folding is much easier. I messed up a bit with oven temperature - I should've remembered to turn it down a notch, so the top is a bit too dark for my taste. The bread turned out quite nice, although I'd put more salt next time. Also, you absolutely need a good bread knife for this one.
- Log in or register to post comments

Well, isn't that a loverly loaf? I followed the formula just as is, using rye flour instead of whole wheat. For the steam I tried a method I saw on a video on this site: throw in a cup of hot water and shut the oven door quickly to trap it. A few minutes later I threw in another 1/4 cup of water, though not sure if that had any effect.
As others have experienced, the dough was very sticky and damp the after mixing the pre-ferment in. I decided that using a spatula rather than my hands is better for transferring the dough from vessel to vessel. Love love love the results!


[click photos for larger versions of them]
There are things you do because they feel right & they may make no sense & they may make no money & it may be the real reason we are here: to love each other & to eat each other's cooking & say it was good.—Brian Andreas
- Log in or register to post comments

- Log in or register to post comments
I'm relatively new to baking, not in general, but just bread. This recipe worked out really well for me. I was so proud that my loaves turned out looking so beautiful!
- Log in or register to post comments
The recipe is great!! Is there a way to double the preferment and "feed" it (like a sourdough starter) to cut the preferment time? Thank you in advance .
- Log in or register to post comments
Well I had nothing better to do this cold winter weekend than to take a stab at some bread. I've been baking bread for many years but have never tried a rustic recipe. I watched some You Tube videos and read some of the blogs on this site and got motivated.
I don't have a cloche, but I do have an old Romertopf clay baker. I baked one loaf on a baking sheet and one loaf in my Romertopf after soaking it in water (the clay baker not the loaf!) I also used King Arthur white whole wheat flour, so it isn't as dark a bread as some of the photos.
I don't have a classic instant read thermometer so I used by continuous-reading digital meat thermometer that has a wire that leads to the base that sits outside of the oven so that I always know the temp. It worked great!
Thanks for the recipe--I'll try it again with some added goodies next time.
- Log in or register to post comments
I am embarrassed (but this is such a friendly forum) to say I let my rounds rise on parchment paper - quite the disaster trying to move them but then I was kooky enough to put the uniloaf onto parchment paper on a cookie sheet to rise and bake. Notwithstanding my best efforts to wreck this bread, it is absolutely fabulous! Of course, I had to cut the bottom crust off where the paper baked into the bread, but it was still yummy. Clearly, that is the last time I let my sense of sympathy for my husband (who had just cleaned the kitchen) get in the way of a floured counter.
- Log in or register to post comments

Are you sure you used parchment paper? I'm confused..did you try to move the loaf off the parchment paper to put it into the oven or did you just put the loaf onto a cookiesheet with parchment paper on it and slide the whole thing in the oven? If it's the latter, after about 10 minutes baking the parchment paper will slide right out from underneath the loaf. Parchment paper is definitely a great tool to have in a baker's kitchen.
- Log in or register to post comments
Thanks for getting back to me. Yes, I am sure I used parchment paper. Unfortunately, I let my rounds rise on parchmentment paper and then tried to shift unto parchment paper to form the loaves. It was such a mess that I had only one uniloaf. I poured the uniloaf from parchment paper to parchment paper on top of a cookie sheet. I didn't try to pull the paper out after 10 or so minutes. I will remember or next time. My dough was really wet and I think it moistened the paper and then stuck when I didn't take it out. I have never had anything like that happen before with parchment paper. It always works great. Okay, another newby question, is there a "side" to parchment paper. I did put it "upside down" from the way I normally would have trying to make it lay more flat.
- Log in or register to post comments

I have had the same thing happen when the dough expands during proofing or spreads out so 2 loaves get to close. I use corn meal under the dough and if proofing 2 loaves, place the dough towards the outside edge and pull a ridge up between the two loaves so they can not touch as they expand. Liberal corn meal will help. Then when it's time to bake pull the edges out so the paper is flat and you have a couple inches of gap between the dough. It's like a paper clouch. When I'm proofing batards I'll roll up a small kitchen towel and place it on the outside to support the outside of the loaf. This eliminates the need to handle the dough just before it goes into the oven, which is a help with high hydration dough.
I don't think there is a top side that matters with parchment. I usually place the cut sheets curl side down, so it stays flat but I don't think it matters.
Hope this helps,
- Log in or register to post comments
I don't usually proof on parchment, but rather flip my dough out of brotforms onto parchment to bake. When I have proofed on the paper I did as Eric does and sprinkle cornmeal on it first, so give that a try.
If there's a right or wrong side..you couldn't prove it by me!!
- Log in or register to post comments
Thanks Betty and Eric for your suggestions and info. My daughter Fiona and I are going to give it another whirl. We will keep you posted.
- Log in or register to post comments
I made preferment and left it out at room temperature for sixteen hours, then refrigerated it. How long can I keep it refrigerated and still use it?
- Log in or register to post comments
The rest of the folks here are far more experienced bread makers than I. With that qualification, I left mine out for 24 hours (by mistake) and still used it. The bread was great and no one turned green.
- Log in or register to post comments
The bread colour, slashing pattern and shape blends wonderfully with the wood grain background. Poster worthy. Any chance to see the crumb?
- Log in or register to post comments
I have tried. occasionally. to make homemade breads before. and omg. this is the best bread (so far) that I have ever made!!
- Log in or register to post comments


- Log in or register to post comments
Wow that's a nice way to start off. Very nice job and I'll bet they taste great.
- Log in or register to post comments
Up until this point, I have only made my loaves in covered baking dishes or cassaroles (ie 2 Qt pyrex). While I get regularly good results, I am unclear on what you are baking these batard shaped loaves on. What do you proof them on and then what do you bake the loaves on? Am I reading correctly that you use a cookie sheet? Are there any issues with the loaf holding its shape?
- Log in or register to post comments
I proof and bake those on a cookie sheet. The secret, I think is in the shaping of the loaf for it to hold shape. I looked on youtube for that and found several videos, which were helpful. Unfortunately, I didn't save the links to those! Good luck with it. :)
- Log in or register to post comments
i dont have whole wheat flour, if i use normal flour will that be okay?? i really wanna make this i just started the preferment
- Log in or register to post comments
I think you could do without the whole wheat flour, although it gives the bread a much better taste. I would be interested in seeing how your bread turned out.
- Log in or register to post comments
they tuned out extremly good and people have been making me bake them for them, it tastes amazing, even with just using all white flour


- Log in or register to post comments

Yesterday, I made bread for the very first time (w00t!).
I chose this recipe because I wanted something similar to the Pane Bello I've often purchased at Whole Foods. To my novice mind, this recipe seemed like a good approximation.
- Log in or register to post comments
I have been working on learning how to bake bread for about 3 months now and this is the best yet. I altered the recipe slightly for my own taste preferences:
In preferment, added one cup (approx.) of whole wheat Sonora flour from local mill (Full Belly Farms) to KA bread flour. Let rise overnight as indicated.
Mixed with rest of ingredients as listed exactly for final dough mixture, using KitchenAid mixer with dough hook on 2 (this is manufacturer's recommendation). This dough is REALLY wet, but based on reading in the Bread Bible and Laurel's Kitchen, and my use of whole wheat flour, this seemed OK. The dough was a bit hard to handle, and took a bit longer to rise than recommended due to the cold air here in the Bay Area of CA this week- but the end result was chewy and yummy and lovely.
I need to work on my shaping skills, however, but I kind of like the weird results!
- Log in or register to post comments

Thanks for the wonderful web site, I'm trying to expand my breadmaking these days beyond "Grandma Vita's" bread and pizza dough.


- Log in or register to post comments

I just got my first 2loafs of rustic bread out of the oven! sweet. it looks great
thx. for the receipe Pete :) PS can any one tell me where I can get 50lb bags of trumps high gluten flour.
- Log in or register to post comments
This is my first attempt at this bread.
The preferment sat all night (approximately 10 hours).
The rise before shaping was almost 6 hours with three folds.
Rise after shaping was 1 1/2 hours.
Had it rise on parchment paper.
Pulled the parchment after 10 minutes.
Total baking time was 35 minutes.
Would like to have some guidance on how to transfer to my pizza stone without using the parchment paper. I own a pizza peel and abhor cornmeal. I slide with flour for my pizzas. I just don't want a ton of flour on the bottom of these loaves.
The crust had great tooth, the crumb was a great color, and the hole structure was perfect for me. It could have risen higher but I think the way I handled the dough caused it to deflate just a little bit.

- Log in or register to post comments

I have a generic Silpat that I got at Bed, Bath and Beyond. I just love it for sliding off my peel and other such uses. I put the cornmeal under the silpat and it glides off.
- Log in or register to post comments
It worked! I did have to turn my loaves over and cook for five more minutes on full heat with the tops facing downward to properly crisp the crust because there's something wrong with my oven (everything- cakes, bread, potatoes- cooked on the middle rack burns before the top is browned. ) but this bread is magnificent.
Oh, and I had to do a second remedial rise because the first time I got stuck at an appointment. They still worked. Is German 1050 flour bread flour?
Thanks so much to all here for the fab tips. I'm buying Hamelman's book.
- Log in or register to post comments
I made this for the first time this weekend for the holidays. I did not have wheat flour and and a bit if an experimenter, so I did the starter as directed and added 1 tablespoon Caraway seed to it. In the main recipe, I used only sea salt and added a good 15 turns of fresh ground black pepper. On the top after scoring, I gave it a light spray of Olive Oil and dusted it with sea salt and black pepper. It turned out quite well and I have another starter on the counter ready to go for this afternoon. I intend to divide the dough into 6. From that I will bake two smaller loaves and will freeze the other balls to see how that works out.
- Log in or register to post comments
Trying the rustic bread recipe, the measurements may be incorrect. I measured 1 # of bread flour and it was less than 3 1/2 cups in the preferment, also2 1/2 cups in the forming of the dough I measured out 2 1/2 cups( 13.3 oz), not 10 oz. Are these the correct measurements.
- Log in or register to post comments

When measuring flour by volume(by the cup), depending on how tightly the flour is packed in the cup, the weight of the flour can vary greatly, from one person to another(or from cup to cup).
Since the weights of the flours are given in the recipe, the cup measurements can be disregarded. Use the weights of the flours, as given.
- Log in or register to post comments
Hi, well I just noticed today that there's some lessons on making bread. I had never in my life thought of making bread, but I was trying to make a recipe that needed rustic bread and I went to the store and I was told it was discontinued. I then decided to make it myself I had no clue there was so many different kinds of flour.
anyways well I"m not sure if the bread came out okay or how it's suppose to. I know it was a little hard from the outside, but was fine in the inside. My husband and son liked it and It seemed fine to me, but I've never had rustic bread, so I'm not sure how the taste, feel, etc its suppose to be.
I'm going to try your lessons then try making the bread again to see if it taste different.
- Log in or register to post comments
Good for you on the success of your first loaf! You liked your bread, as did your husband and son, and that's what really counts.
Rustic bread is supposed to have a crisp crust, so it sounds like you did very well.
Enjoy the lessons and if you have any questions, just ask and you'll get lots of help.
- Log in or register to post comments
Tried this one out this Thanksgiving weekend, and while time consuming was well worth the result. It tasted terrific, looked good, had a wonderful crumb, and makes and excellent base for french toast. Thanks for all your great information.
- Log in or register to post comments
What an amazing assortment of photos! Rustic bread is truly divine! I have finished poolish Ciabatta today and it turned out great! I realized that it's all in the handling and not letting out the gas to keep those big air pockets. Nothing can beat that satisfaction of making your own and the smells that come out of that oven.
- Log in or register to post comments
And a great website. I found this recipe yesterday, so I thought I would give it a try. The dough was a little wet and needed another half cup of flour but the results appear good, so far! I pulled this 20 minutes ago.

- Log in or register to post comments


- Log in or register to post comments
Just pulled from the oven. The dough sat in the fridge for two days. I let it come to temperature and do a final rise after I formed the loaf. I have a long ways to go when it comes to forming a long loaf properly. More oven spring than I expected.

- Log in or register to post comments
But this is the perfect recipe for what I'm trying to accomplish.
I did the preferment yesterday using a piece of leftover dough from the last batch instead of yeast. I used almost no yeast when I combined it with the rest of the ingredients today. I measured instead of weighing and the dough is actually a little tighter. I didn't add any more flour than the recipe calls for this time either. I'm not baking until tomorrow, so I'm doing the first rise today and then I'll throw it in the fridge overnight. I'll form, proof and bake them tomorrow. I'm also using just white flour until I get the results I'm looking for.
So far, this hasn't been nearly as damaging to my waistline as when I was trying to perfect creme brulee'.
- Log in or register to post comments
Just pulled two from the oven. Very different than the first batch. I pulled the dough out of the fridge and let it warm up a bit before I formed and proofed the loaves and placed them on parchment. They looked like ciabatta loaves going in but sprung up nicely. The crust is ligher but crisp with a light mouth chew. The crumb is almost exactly what I'm looking for with a nice custard feel in the mouth and good flavor. They just came out kind of ugly.
As for the actual baking, I heated the oven to 550 and then dropped it to 450 when I put the loaves in. They were misted with water as was the inside of the oven, instead of the 1/2 cup of water in the hot pan, like I usually do. 20 minutes total was enough but I'd probably go a couple of minutes longer the next time around.
As with pizza, parchment proved it's worth. Both loaves were on the same sheet and ten minutes into the cooking process, I just pulled it out. No muss, no fuss.
I also have a nice little starter created from a piece of dough from the batch I made earlier this week. Goodbye yeast? ;-)


- Log in or register to post comments
I saw your recipe for Honey Wheat Bread and you soak the wheat flour for an hour or so. What are your thoughts of doing that for this recipe?
- Log in or register to post comments
This one isn't as wheaty, I don't think, so I personally didn't think it was necessary, but it wouldn't hurt anything to try it.
- Log in or register to post comments

Here is a picture of a loaf of Rustic Bread I baked today. I had to play with my new toys - a 9" round brotform, new lame, and bread peel. Thanks to everyone on this site for all the great information - it really helped me get used to new(for me) techniques - French fold, stretch and fold, shaping and scoring. I usually made whole wheat bread in loaf pans - this is a new and different experience. I'll post some 'crumb shots' once the bread is cool enough to cut.
The obligatory 'crumb shot':

- Log in or register to post comments
What kind did you buy? Are you happy with it?
- Log in or register to post comments
I bought a wooden baker's peel at Bed, Bath and Beyond! It was pretty inexpensive and works fine putting loaves in the oven. Usually, I take the loaves out of the oven with oven mitts.
- Log in or register to post comments
This Rustic Bread recipe marks my third attempt at artisan breadmaking. The first two attempts (a basic boule as well as the herbes de provence recipe on this site) were smashing successes, but this one has gone very wrong. I somehow ended up with something more like batter than dough. Others here have mentioned similar problems, yet nobody seemed to respond to that specific issue. Anyway, I was hoping that after the rise and periodic folds (but seriously, it was like trying to fold tar) that it would find some structure, but I'm ready to put these in the oven, and I've got two "puddles" of batter on the counter about 12" in diameter and an inch tall. There is no shaping these things.
I had one bread pan available, and I'm making use of it for one of the loaves. Forget scoring. It's out of the question. We'll see what comes out of the oven in about 30 minutes.
So something went wrong, and I know it's not the recipe since people have clearly had great success with it. I'm pretty meticulous with my measurements, double - and triple-checking everything as I go, but perhaps I messed something up. I know humidity can be a factor, and it's pretty humid here in New Orleans today. Could it be that big a factor though?
Oh well, it's a let-down to be sure, but I hope to try again. At least bread fixings are cheap! Any thoughts/suggestions are more than welcome.
Note: My pre-ferment doubled in size as did the final dough. In addition, the gluten was there in force. I can't help but think I was short on flour.
- Log in or register to post comments
Well, the loaf came out nicely. Let it rest for 30 minutes and tore into it. Great texture and flavor, soft inside with a delightful crust.
I don't know if the dough was supposed to be that way or not (I'm guessing not if people were actually able to shape theirs), but the end result was wonderful.
- Log in or register to post comments
Ha! Nevermind then. :)
Definitely the first few times you bake with high hydration doughs it is scary. "No way is that going to come out right," you think, but amazingly it (usually) does.
- Log in or register to post comments
Yes, the humidity could be a factor, as could how fresh your flour was or any number of things like that. By all means, if you gut is telling you a dough is too wet or too dry, trust it and make adjustments.
This one has been pretty reliable for me, but clearly one's mileage may vary.
Better luck next time!
- Log in or register to post comments
Like I said, the one loaf I got out of it turned out nicely in the pan. Probably worlds different from yours, but still a treat (it didn't even last a day in my house). I will definitely try again. If I end up with the same goop, then at least I'll know that it's environmental and not a mismeasurement.
If it does happen again, what would you recommend to rectify the situation? Incorporate more flour?
Thanks for the feedback. This is a great site!
- Log in or register to post comments
Yeah, sprinkle a little more flour in, or keep the faith and push on. wet doughs are tough to handle, but they make tremendous loaves.
- Log in or register to post comments
I made this yesterday and it was perfect untill I put it in the oven! I was spraying it with water and once i was done I realized that I had sprayed it with soapy water! I nibbled on the insides but had to throw both loaves out.
- Log in or register to post comments

My first attempt turned out to be FANTABULOUS! I liked the crust and next time, I will have to let it proof for more than the two hours the second time and not touch it as much. It was just too cold! I also added a little more salt, using kosher.
ps. I learned that tossing in a few icecubes into a metal cookie tray helps with the steam. I did this twice during the bake. just make sure not to let any of the ice hitthe glass! thanks for the post!
- Log in or register to post comments

I have been reading this site for a week, was looking for tips on my futile attempts at creating a sourdough starter. So I ran across this recipe and thought I'd try it. I'd never heard of a preferment before and it was an attractive idea! So last night, I mixed it up. I only have a gram scale so I had to convert lbs and oz to grams, no problem since I'm a wiz at Excel! Anyway it looked pretty stiff last night, but this morning. oh my! It was almost overflowing the bowl! So then I waited until 15 hours after I mixed it, and continued on with the recipe. It rained yesterday so the climate here is moist and apparently that lead to an extremely sticky loose dough! I was frightened but figured it was either add a bit of flour or have a pancake for a loaf. I was very careful to only add enough flour so I could roll the dough out with a spatula in one piece. I followed the fold and rise instructions to the letter. My baking stone is only big enough for one loaf so I also put a cookie sheet in the oven, set up a pie pan for the ice cubes.
I have been making bread for 20 years or so, but never attempted any type of artesyn bread so shaping the loaves into a batard was a challenge but fun! I let them rise, heated my oven to 450. I scored the loaves, which was insane with that high of a hydration, but my kitchen knife is extremely sharp and worked like a charm! I popped the loaves in the oven, used a squirt bottle and popped some ice cubes in a pan in the bottom of the oven, set the timer for 35 mins and couldn't wait to see the results! Who knew that bread making would make my husband so romantic! So 45 minutes later, this is what I got out of the oven! They're a littled dark but I can't wait to cut one open and try it, they smell fantastic! Thank you Floyd for sharing this recipe!

- Log in or register to post comments

Beautiful-looking loaves, congrats !
- Log in or register to post comments
Thank you! The crumb isn't quite as airy as I'd hoped so I won't post a pic of it until I get it perfect! But the kids and hubby said, " wow mmmmmm yummy nom nom nom!" It really tasted like bread I'd pay good money for at a bakery. It was fabulous! And nearly gone now, guess I'll be making more next weekend. woo hoo.
- Log in or register to post comments
Doesn't look too dark to me. You should shoot for this robust a bake for this style of bread. Let me know if it wasn't awesome. Makes me hungry just looking at it! Good work.
- Log in or register to post comments
Thanks! It was just a tad bit over but tasted wonderful. Tonight, I'm making it into some creole onion soup :D I'll post a pic of that when it's done. I'm really gonna work on getting that oven lift next time
- Log in or register to post comments
Here's my creole onion soup, and yes the bread made a difference!

- Log in or register to post comments

I am a long time bread enthusiast and "all things carb" consumer. I decided to bake my first loaf a couple of weeks ago, after experimenting with making croissants. The "croissant experience" drained the heck out of me, but didn't turn out half bad. I happened to come across this site while looking for a loaf recipe to try and landed here! This bread was delicious and I got some great feedback from my friends that tried it out.
After being whisked into a world of jargon that I had/have no familiarity with (ie. preferment, poolish, scoring, crumb, proof, etc) this is what I came up with:


I used a mixture of rye and bread flour. In general, my dough was very firm throughout the process. I was a bit unsure of what the texture of the dough should be, having no prior experience. Also, I do not have a lot of baking tools yet, so I improvised here and there, mixing everything by hand. In general, is a standing mixer with a hook going to give better results?
I am aiming to try a sourdough in the near future, but am a little intimidated by the recipes. Can I expect it to be much more labor intensive than this type of recipe?
Thanks for any help. I am really glad to have found this site, it seems to be a great learning community!
- Log in or register to post comments
I just started working with sourdough - and LOVE it. It's not more work(if you don't mind feeding the sourdough beast periodically), just more wallclock time involved once you get your starter going. I highly recommend using the pineapple juice method by Debra Wink to get a wild yeast starter going. It worked for me first time (I also froze some as insurance in case my starter goes south.
David Snyder has a great San Francisco Sourdough formula, that makes one or two large sourdough loaves. Lots of other great sourdough formulas to be had on this site. Enjoy!
- Log in or register to post comments
Ah, okay that makes sense.
I will definitely check out these suggestions. I have just begun wrapping my head around the idea of a starter and have been trying to watch some video tutorials for tips. I think I am ready to take the plunge!
- Log in or register to post comments
I made this bread for Christmas day (without rye flour) and it turned out great. Best bread I ever made. I made it again today with 40% spelt flour in both the preferment and the final dough. It is spectacular. Nice and chewy with a great crust and very nice flavor. My wife and son raved about it.
Hope to post a picture soon.
- Log in or register to post comments
- Log in or register to post comments
I have never made bread before and tried this one. WOW is all I can say!

I wish it had turned out not so brown ( less cook time?) and that I had used all white flour. It did not have big holes ;(
Thank You for the recipe I am going to try again next weekend ;)
- Log in or register to post comments

A dark crust (and those aren't anywhere near "too dark") is more flavorful than a pale crust, so enjoy.
That's a spectacular first attempt! Congratulations!
- Log in or register to post comments
I started to make this bread last week, had everything mixed & ready to go but had to leave for 5 days. So, I put the dough in a food save plastic container in the fridge. When I came back home let the dough come to room temperature and shaped, baked and ate. It was delicous but different. Two questions: 1-the dough had a fairly strong aroma the only thought that came to mind was beery, yeasty, alcohol smell. 2- when baked the bread was very good and had a slight "sour" taste. I've never made sour dough bread but this is what came to mind. Was this a type of "accidental" sour dough?
- Log in or register to post comments
More or less, yes.
- Log in or register to post comments

I had some WW flour but it smelled old, so I ground up some wheat berries in the VitaMix and I think that worked very well. The bread turned out okay. it does taste great! I would have preferred larger holes. I had to handle the dough about 30 minutes before baking because I realized I had set it for final rise on the baking stones. duh. Also, I made the big mistake of adding bagel sprinkles to the top of the bread and it distracts from the great taste of the whole wheat. Live and Learn, I guess.
Next time I think I'll do like some above did, and let it sit in the refrigerator for a couple of days and see how that works out.
Thank you Floyd for making it easier!


- Log in or register to post comments
Those loaves look great, Topaz! Well done!
- Log in or register to post comments
I've started to home my baking skills. And this was my second attempt at this bread. First came out a little heavy. I think due to room temp. So I got creative, bought a (safe) space heater and turned my bathroom into a proofing room. I've learned that patience is critical on the rise before they go into the oven. My oven is a bit smaller. And my judgment on big they would expand is off. But they are delicious. I used bread flour and a mix of wheat and rye. My preferment wbutternut stickier as I added more water to ensure the flour was hydrated sufficiently.


- Log in or register to post comments
I like this recipe. It came out a little more dense then I was going for, but the flavor was really great.
My biggest problem is figuring out how wet the dough should be. "Hydrate the flour" isn't specific enough for me--a fairly new at making bread. I think if there were pictures of the steps so people can see what the dough should be looking like, that would be really helpful
- Log in or register to post comments
Not sure if this is the right place for this post if please move it a tell me whereto go, thank you. I have tried this receipe 3 or 4 times and I Never get a second rise, don't know what I am doig wrong?? Have done the same with the Italian Bread reciepe, all I get out of both is obese pancakes!! Have gone thru twenty pounds of flour and not one slice to show for it. I'm so jealous of those that say it was wonderful First time . Please someone help. Thanks so much in advance for any advise. Pablo81
- Log in or register to post comments
This is the best bread recipe!! A couple of tips - if you live in a dry climate like I do, you will neet to add more water to the recipe amounts (I add 1/2 cup). I make all my bread by hand and the best tool is the Danish Dough Spoon, it mixes in the preferement perfectly. I bought mine online from Bread Topia. I would suggest for new bread bakers to google bread making and flour selling sites, there are a lot of good video instructions and reading material to help you.
- Log in or register to post comments

I made this bread a couple weeks back, but it came out rather salty.. While I thought it could do for a night of drinking! I liked that, salty bread begets more beer.
BUT. I think it may have something to do with not letting the preferment sit long enough.. Maybe. But I'm not sure. I might use less salt next time, but I totally want to make it again because past the salty taste, it was super delish :3
- Log in or register to post comments
I followed the recipe as written. The proofing was beautiful, the bread smelled wonderful. I baked them on a stone and they turned out wonderful. Took a bite and the flavor was very bland. The flours I used are white lily bread flour and a course rye. Any suggestions
- Log in or register to post comments

How was the crust/crumb color? If the crust was pale/yellowish and the crumb was an unhealthy shade of white then I'd say you might of over fermented that rascal. But if the crust was reddish and the crumb was creamy looking then I'm wrong.
- Log in or register to post comments
The crust was a nice deep brown and the crumb was a very nice creamy color. This is why I am so baffled. Everything was very nice, except for the flavor-or lack thereof. I was very excited when I took this out of the oven and cut it because it looked so good. I am going to try it with a wheat flour this week and see if that makes a difference. I will post pictures of the 2nd loaves as well. Hoping these come out better.
- Log in or register to post comments
This is my first time making this Rustic Bread Recipe. I just mixed up my preferment, having never using a preferment before, I don't know how this should look. All the flour and water was weighed, and when I mixed it, had to add another 1/4c water to get the flour dampened. My dough is kind of like a moist gravel texture, and not a cohesive dough at all. Is this how this should be?
Thanks for your help.

- Log in or register to post comments
I know this a bit after the fact, but I'm not on here often. In my opinion, that is too dry. Mine have had at least a cohesive dougball texture. Did you measure by volume or weight? Thelee are fewer discrepancies when you weigh out the ingredients. Good luck!
- Log in or register to post comments

Thanks Floyd you got me workin on upgrading my rustic bread. Last evening my goal was to get a better crust so I went 500 degrees in the kitchen oven with a water pan. Got a good crust this time but my sourdough needs improvement in other areas. I add 3 T sugar to the dough but after reading the posts here I see I don't need it. Next time I make dough no sugar and a little less hydration then we will see what happens. I feel I'm on the right path with bread -made my own starters, now have 3 different starters in the frig- thanks to your recipe and advice from all above.
Will report next time with pictures. Upward and Onward!
- Log in or register to post comments


the dough itself after the final mix was pretty wet dough. Instead of doing the old school of kneading it when combining the wet n dry, I strictly used the stretch n fold method.
Hope u cud enlighten me here as what did I do wrong here. I want to bake this again n again. Tqs For yr time.
- Log in or register to post comments
I made this bread per the instructions. Didn't have a brotform or a couche, just let it do its thing on a cookie sheet with a dusting of flour.
The crust and crumb were fantastic, but the taste was meh. Did I do something wrong, or is this recipe generally not super flavorful?

- Log in or register to post comments
I get this question occasionally, about this recipe and a some other, and. well, it puzzles me a bit. What sort of flavour are you looking for? I've always enjoyed this bread, but it is what it is: a simple French bread with a small amount of whole grains to give it a bit more depth.
In general, it is difficult to produce as strong a flavour with a yeasted dough as a sourdough, and a loaf with only about 25% whole grains is going to have a less pronounced earthy flavour than something containing more whole grains. Longer, slower fermentation will tease more out of your ingredients, and using high quality ingredients and unbleached flour help too.
I guess one thought is if you know of a bread with a flavour profile you'd like to reproduce, find out a little bit about it -- Is it leavened with sourdough or conventionally? Made with whole grain flour or white flour? Does it contain cracked grains or other ingredients that impact the flavour? -- and then pursue that. You might find out an entirely different approach or set of ingredients is required to get what you were looking for.
Is that at all helpful?
Your slice there looks great, by the way.
- Log in or register to post comments
It'll be hard for me to describe the flavor. Let's see.
- Log in or register to post comments
The blisters on the crust suggest to me that they shape their rolls and then retard (refrigerate) them for quite a while, probably overnight. Never having tasted them though I couldn't say what else is different about them. A touch of malt is one possibility, or whey, like in this Italian Roll recipe.
- Log in or register to post comments
I tried this but I prefermented the whole recipe so I mixed it up and let it ferment for about 15 hours. The dough was a bit loose and I ended up kneading the dough about 15 minutes in the morning. I ended up with two medium to small loaves. They had great crumb and was chewy and had a great flavor. I will work on this some more, but if I get this kind of outcome I am happy. I am somewhat of a new bread baker fanatic, so I am eager to explore.
- Log in or register to post comments
Made my first rustic bread of 2014. The loaf looked way better than the versions I tried twice in late (2013, a few posts above).
Question for all: Is it usually this flat? (See last photo.) Overall I'm happy with the shape, but I want to know if my rise is not happening as expected.


- Log in or register to post comments
Nice looking loaves everyone! This looks like a must try.
- Log in or register to post comments
So, I had a ball making the sponge, and the dough. At the moment, I have my first two loaves in their final rise awaiting baking. I figured this first time, I would stick to the known, but I wonder if anyone has experience using this recipe with a 2 lb loaf pan, especially the KAF Rustic Hearth loaf pan? How is the baking time effected? Does it keep a nice top form, or does this recipe flatten out?
- Log in or register to post comments
Does anyone know how to calculate making this bread so that the end result is 50 loafs? How do you calculate 50 loafs using this recipe?
- Log in or register to post comments

Whole Rye Flour 10%
Whole Wheat Flour 10%
Yeast 0.19% instant or 0.6% fresh (instant % is calculated based on the weights he gives in the book)
Preferment (50% total flour in preferment)
Bread Flour 100%
Yeast 0.1% instant or 0.5% fresh
Suggested loaf size is 1.5 pounds or 0.68 kg. 50 loaves times 0.68 = 34 kg total dough needed. Add up overall formula percents = 1.7099. Figure your flour amount by taking 34 kg divided by the sum of the total formula percentages.
Flour = 34/1.7099 = 19.88 kg, rounded up to 20 kg so you have some wiggle room. Plug in total flour to the formula and there you go.
Bread Flour 80% * 20 kg = 16 kg
Rye Flour 10% * 20 kg = 2 kg
Whole Wheat Flour 10% * 20 kg = 2 kg
and so on. And since we know 50% of the total flour is in the preferment, you know for that you'll be using 10 kg out of the 20 to make it, so 10 kg flour, 6 kg water, 0.18 kg salt, 0.01 kg instant yeast.
- Log in or register to post comments
I guess the reason for this is that everyone has different needs. So, if a baker needs a specific quantity for a party or event this is the simplest way tofigure it out. It takes the guess work out of everything. However, on the other hand, when the heat get turned up on you in a professional setting, it would be easier to just refer to a chart with straight gram counts based on increments. Such as, Bread Rustico: 25# Flour, 5#Wheat etc. The temperature also plays a huge factor into the final product if you are looking for consistency. So, if it is hot in the work envirnoment hence you need to use colder water. My grand father a commercial baker (Austrian) would use ice at times if it was very hot and sticky in his water.
So, although this may be a long shot. But does anyone know of a chart that shows loafs increments of 10 showing actually gram measurements. Does anyone want to help me on this project?
- Log in or register to post comments
I thought for some reason the original post had temps and all the instructions or I would have included that.
For the pre-ferment it's 12-16 hours at 70 F
After mixing the DDT is 75 F.
Bulk fermentation should be 2.5 hours at that temp. Hamelman folds the dough twice at 50 minute intervals.
Preshape to loose rounds and bench rest 10-20 minutes before final shaping.
Final fermentation should be 1.25 to 1.5 hours at 75 F.
Presteam oven, load bread, steam again.
Bake at 450 F 35-38 minutes for the 1.5 lb/0.68 kg loaves.
For the gram measurements, easiest thing would be to plug the numbers into a spreadsheet. LibreOffice is an excellent free open source program if you need one.
- Log in or register to post comments
I'm not a professional baker or anything, but I based what I do on the Bread Baker's Guild of America formula guidelines, but lazier because it just needs to be good enough for me at home (and I don't know excel very well). So this is an example of how I would put in a formula for 10 units of 0.68 kg bread. In this case, I figure out what my total dough weight is, 0.68 kg * 10 = 6.8 kg or 6800 grams. I bumped it to 6900 to account for some loss during the process. I have no idea if that's enough when baking in large quantities though.
From there, the green cell in D5 calculates the total flour using the formula I mentioned above, TDW divided by the sum of the baker's percentages (multiplied by 80% for the bread flour, 10% each for the other flours). Everything else then calculates based on that flour amount. (And I have to enter what % of flour is pre-fermented.)
I also have it automatically rounding the numbers which is why it comes out 2 g more than the TDW entered.
*edit, put wrong recipe in on original image.

- Log in or register to post comments

5/11/14. I am a novice bread baker. Made "Rustic Bread" today. Tastes good. Beautiful holes in crumb. But need advice on two issues:
1. Following the formula, the dough was VERY wet, sticky. I could not shape it well. . Would not hold boule shape before baking. Flattened out before baking. Did not flatten out more once in the oven.
2. Never achieved the beautiful dark crust in picture. Only reached golden brown when done.
- Log in or register to post comments

Love this bread, think I will go make a loaf. This makes for a great french toast in the mornings. I'm wondering how it would stand up as a bread bowl for some clam chowder
- Log in or register to post comments

I'm new to this site, but not to the baking world. I work as a pastry chef in a small coffee roaster/cafe. I have been baking bread on and off for years, but have only become serious, or you could say obsessed after I lived in Germany doing my pastry apprenticeship there. I long for bread like that constantly. With all that being said, I made this bread for the first time yesterday to pair with a cheese and beer tasting event at the cafe. The bread went perfectly with all the cheeses, charcuterie and beers. The slight nuttiness from the rye and wheat flours was a perfect accompaniment. I am not sure what the other commenter is talking about the bread being "meh" in flavor. I really love this flavor with the rye and wheat. I have used quality flour though so perhaps that is key. However, it's fantastic and everyone just gushed over it. Thanks for the knowledge this site gives out.
I am including a picture. I need to work on my scoring. think I scored too deep and held the lame at too great an angle. Any advice. practice right. LOL. I don't have a picture of the crumb, but it was amazing looking!!
Boules were baked at 500F on stones with steam. Then after 15 minutes I vented the steam and baked for 20 more minutes. https://www.flickr.com/photos/126435869@N08/14570627507/
p.s on a side note I just started a rye starter yesterday : ) excited!!
- Log in or register to post comments

I shall bake this bread tomorrow, looking forward to it.
Can this be baked in a Dutch Oven?
I love the look of it so much.
I wonder if we could substitute the yeast for Sourdough or just add a bit of Sourdough as flavour enhancement alongside the yeast.
I shall do that after I tried it first with your original recipe.
- Log in or register to post comments
I've got to admit that I've taken Floyd's contribution here, scaled it down a bit after converting the weight to grams, and shamelessly exploited it for all it's worth. The next time I'm in Norwich, VT, I'll look for Mr Hamelman and tip my hat to him as well.
My metric version of the formula won First Prize in the ethnic breads class at the Leavenworth County Fair on Monday and was part of my handouts for the class I taught today. That experience is described in my blog post from 1 August.
If you haven't baked this bread yet, you've got to try it at least once. If you have baked it once, you've probably baked it again. Pass it on to another baker.
- Log in or register to post comments
Care to provide your metric measurements that produced the winning bread?
- Log in or register to post comments
This is the conversion to metric that I figured out on paper. I never bothered to learn how to use a spread sheet effectively so these numbers aren't precise but the formula does work. I scaled the ingredients down to 80% for my fair entry and still had success so I'm confident that the numbers can work for other bakers.All you have to do is follow the link to my blog.
If you go back a few posts, you'll find a conversion that's much more complete by ericreed, getting into the bakers math aspect, desired dough temperature, and a few other points. It's a really good.
- Log in or register to post comments
While I was rereading my blog, I found that I had listed the ingredients for the County Fair loaf in a recent post. This is the cut and paste list.
220 g bread flour
118 g water at 85F
4 g kosher salt
1/8 tsp active dry yeast
126 g bread flour
43 g whole wheat flour
All of preferment
156 g water at 85F
4 g kosher salt
I hope that this is easier for people to replicate. The loaf turns out to be of practical size for a small family or even a married couple such as Mrs PG and I.
- Log in or register to post comments

I know that this post is over a year old but I just used this recipe to make the best loaf I have ever made. I registered just to be able to comment on it. The taste is incredible! I didn't quite follow the baking method though. I baked it in a dutch oven and threw a quarter cup of water on top of the loaf just before putting the lid on. I baked it for 30 minutes with the lid on and then another 15 with the lid off. This is one recipe I am sure to make again!
- Log in or register to post comments
Can I use a Dutch Oven to bake these beautiful loafs?
- Log in or register to post comments
Yes, I would definitely think so.
- Log in or register to post comments
Sorry for the late reply, I shall bake this bread the day after tomorrow, looking forward to it.
I think we shall eat it with a nice bowl of Goulash Soup:)
- Log in or register to post comments
I'm new to this site but I got here as fast as I could! I Love this place and the like minded people here. So, my user name is Elly May (for anybody that remembers the Beverly Hillbillies) because I was cursed when it came to bread. Cursed to the point of failure since moving to my new state 12 years ago and gave up until this recipe. I've bought every "additive" avail, Googled, went into chats.. failure. I finally asked myself what was my common denominator, Water. Bread is the only thing I bake that uses water. Picked up Le Bleu bottled and curse lifted. Who knew?
This recipe is my first success and it was so tasty and perfect . I baked this in a cast iron skillet with grits sprinkled in the bottom and I reduced the oven by 25 degrees. I followed the comments of keep it wet and treat gently and to deal with the stickiness I did the spreading of dough on parchment so no turning the dough, just turn the paper and I never had to even pick the dough up actually. Rolled dough into the skillet too.
I can't wait to try more recipes and I rewarded my success by buying a Le Cloche!
To place dough back into the proofing bowl I picked up the paper and rolled the dough off ( a little finger tip scraping required) into the bowl. The way an EMS crew roll a big big person onto a stretcher by picking up the sheets patient and all. I used an instant read too and this is the first time I heard of using one. I highly recommend it.
Nobody's making jokes and calling me Elly May anymore with this recipe.
- Log in or register to post comments
I have used this as my go-to loaf the last few months and am trying something tonight.
i added a cup of peanut butter and will see how it goes. I love the taste of peanut butter, especially when part of the wheat bread and the smell of peanut butter bread baking is heavenly. I am hoping this dough is a good base for these experiments. In fact, if I am bold tomorrow, I might try to dust the top with cayenne to get a little heat on the crust. I didnt want to mix it in because it seems to hurt the yeast.
i will post my loaf when I am done.
- Log in or register to post comments


I divided it in half, rolled them both out, spread peanut butter in them an then rolled them up.
I could have used more cayenne and doubled the amount of peanut butter.
[edit: I noticed that the peanut butter swirl inside the rectangular loaf was to heavy for the crumb and it collapsed.]
- Log in or register to post comments
Made this recipe today and it was a hit. One comment that I heard was, "this bread is to die for." Making the bread my one thought was, that is a lot of salt. But the bread was very good. I will make it again.
Thanks for the recipe.
- Log in or register to post comments
Actually at 1.8% the salt is on the low side of normal. Salt is usually between 1.8 and 2.2% (although I think in the UK several people are now using 1.5%).
Glad the bread turned out well.
- Log in or register to post comments
Salt should be 2% of total flour but as with everything else in baking you'll find many opinions. Salt is a dough conditioner and controls the yeast. You don't want too much (a little goes a long way) as that will inhibit the yeast but you will still get good results with slightly less.
- Log in or register to post comments

I have been using a quick (5 Hour rise) rustic bread recipe and have been looking for a traditional one. I can hardly wait to try this one. I'm new to this forum and am already learning so much about bread making. I can see more bread adventures in my future.
- Log in or register to post comments

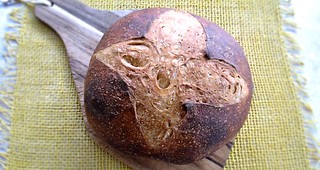
This is a great recipe, tastes better than my cheat's sourdough - thank you! It was quite tricky though using fresh yeast in such miniscule quantities, especially that I scaled down to half, for one loaf. I added 1-2g to the preferment and 2-3g to the main dough.
- Log in or register to post comments

- Log in or register to post comments
I made this recipe this weekend, and baked the bread in my grill. Came out great!! Excellent bread
- Log in or register to post comments
Floyd - I just noticed today that the formula you posted at the top of this thread differs slightly from what is in my 2004 copy of Hamelman. I presume that is because you posted what you did rather than what is in the book, but I thought I would ask.
- Log in or register to post comments
It has been some time but, yes, I'm certain I did not post Hamelman's recipe verbatim. I simplify and cut corners in places where I don't discern a significant difference.
- Log in or register to post comments
My experience with Hamelman is that he has polished and tweaked his formulas to the point of perfection for his bakery. I found a case where I discovered something and when I went back to check on what he had done, discovered that he had made a very fine adjustment that was not even noted in the text (a case where a more sour loaf needs more salt to balance the flavor profile). And that is what it takes to produce award winning product. But I understand your point. Thanks for the clarification.
- Log in or register to post comments
I don't disagree for a moment and would never compare my baking expertise to Hamelman's. He is a master craftsman who has baked these recipes hundreds, if not thousands, of times. I just want to share something tasty my family and friends enjoy. If cutting a corner here or there makes baking it simple enough that I'll (or others) will bake it often, that is far better than something complex that gets baked once (or not at all).
- Log in or register to post comments

thanks for the post of this fantastic bread, I will save the recipe and most cerently make one this weekend!
once again thank you so much
- Log in or register to post comments

made the bread this weekend and they looked great after the final rise bit when I tried to transfer them to the baking stone one caved a lot and the other a little. One looked like I punched it down and the other not so bad. I just baked them because my stone was hot and they were on there. The flavor was good but it definitely was denser than they should have been. I kept them wet so they could rise (they did) in the oven but pre bake they looked beautifu. Until I can figure it out I'll just let them rise on a baking sheet.
- Log in or register to post comments

to me like it may have been over proofed.
- Log in or register to post comments
I'm not sure, I followed the proofing times and even went a little fast with the last one. Maybe during the "fold" portion I didnt degass the dough enough. When shaping it into a ball before the football shape are you supposed to be degassing it? I think I just shaped it waited the 5-10 minutes then shaped it again.
- Log in or register to post comments
What have you experienced with the character of the crust in this "Rustic" bread. On the continuum between thin /making a sound when you slice it, crusty and . . . . . . . . . . . . thick chewy, break your jaw; where does this bread fall? Does baking in a cloche vs. on a stone make a difference in the character of the crust? Please advise. Thanks much. Jim Burgin
- Log in or register to post comments
New to baking, and ready to try my first artisan loaf. "Rustic Bread" recipe looks perfect. Wondering about a few things before I jump in:
1. Recipe says " add water and mix until flour is fully hydrated ". Does this mean that I keep adding water while mixing only until fully absorbed by the flour?
2. Any missing info, or possible pitfalls that i should be aware of?
3. Recipe makes two boules. OK to swap for a batard shape? Any change to recipe if I do this this?
Looking forward to the end result. I'll let you know how it goes.
- Log in or register to post comments
User login
Navigation
Recent Forum Posts
Bread Books
Also on TFL


Follow The Fresh Loaf on:
All original site content copyright 2017 The Fresh Loaf unless stated otherwise. Content posted by community members is their own. The Fresh Loaf is not responsible for community member content. If you see anything inappropriate on the site or have any questions, contact me at floydm at thefreshloaf dot com. This site is powered by Drupal and Mollom.
Borgo Erbiola-Mimosa (gr./1st floor) Rustico


Photos of the the holiday home and surroundings
Outside area
Swimming and wellness
LA BREVA Recommendation
Floor plan and ambience
- double bedroom
- lake view
- mountain view
- double bed couch
- shower
- washbasin
- WC / bidet
Regional and location information
There are two beautiful riding stables are only 200 meters from Borgo Francone.
There are local kayaking possibilities.
On your way to Colico there is a renowned water sports center and a large supermarket.
There are sailing schools and kite-surfing schools, motor boat, kayak and sailing boat rental facilities - Lake Como has so much on offer the water sports fan.
In Colico, next to the town square, (which is surrounded by restaurants, cafes and shops), there is a small train station, from which you can get a direct connection to Milan. Alternatively, hop on one of the public boats that stops at the Colico harbour/pier and visit the most beautiful villages and towns along the lake.
Direct distance
- mountain panorama
Floor plan

*(All plans are merely a guidance and not to scale!)
Furnishing / Features / Extras
- central heating
- pets allowed
- oven
- icebox
- dishwasher
- electric/gas stove
- coffeemachine tabs/pads
- garden
- terrace
- charcoal grill
- Final cleaning
- linen
- towels
- washing machine
- parking privat
- Internet WIFI
- TV-SAT
Season prices
Price inclusive additional costs and booking fees.
Exceptions indicated - laundry see features.
- heating on consumption
- air condition on consumption
Clients reviews

Positiv erwähnen möchten wir den Brötchen-Service, den ein örtlicher Anbieter zu einem sehr fairen Preis übernommen hatte. Und dass es eine Waschmaschine gab, die wir nutzen konnten. Das WLAN war - wie von Ihnen angekündigt - sehr langsam, konnte quasi nicht genutzt werden. Aber das wussten wir ja vorher.
Nachdem uns die Gegend insgesamt sehr gut gefallen hat, werden wir nächstes Mal ein anderes Domizil wählen.
Take advantage of one special offer
More details of your rental property owner including address can be provided on request.
Please be advised that for reasons of privacy we will not publish information about our owners online.
We are happy to answer your questions wherever possible - all vacation homes are known to us personally and are visited and evaluated several times a year.
Your LA BREVA Team
** Together - *** Please contact us before booking - we clarify based on your needs
Discounts may not be combined with other offers/discounts/gift certificates and does not apply to existing bookings. Errors and omissions excepted.
The Highlights
from 693,00 € / week
from 99,00 € / day
Please do not enter children under 3 years - Free of charge
Minimum travel time: Holiday houses / apartments 4 nights, Hotels / Agri 2 nights
See prices / services for any on-site costs that may arise
Your advantages
Are you only looking for a holiday home or are you looking for complete holiday? In addition to the best price guarantee for this holiday home, LA BREVA also offers many tips for recreation and hobbies.
Last viewed holiday homes

Beautiful holiday with LA BREVA:

Newsletter
Request now and be informed about our latest offers. As Lake Como Specialists we will keep you up to date with all upcoming local festivals and provide information such as where to shop, insider tips
Hotel Flüelerhof B&B Garni Rustico
Direkte Links
Anreise: 17:00 - 23:00
Die Unterkunft Hotel Flüelerhof B&B Garni Rustico bietet Preise ab RUB 5.399.
Geben Sie Reisedaten an und sichern Sie sich diesen tollen Preis.


Gesamtpunktzahl
Gebührenpflichtiges WLAN 5,6
Gebührenpflichtiges WLAN 6,7
Gebührenpflichtiges WLAN 5,4
Gebührenpflichtiges WLAN 6,3
Gebührenpflichtiges WLAN 4,7
Gebührenpflichtiges WLAN 7,5
Der Flüelerhof Grill Rustico bietet Ihnen Aussicht auf den Vierwaldstättersee, eine Terrasse mit Pflanzen und Blumen, eine Bar, ein Café und ein Restaurant. Freuen Sie sich auf Zimmer mit Kabel-TV.
Beliebteste Ausstattungen
Parkplätze
Allgemein
WLAN in allen Bereichen
WLAN gegen Gebühr
Speisen & Getränke
Restaurant (à la carte)
Rezeptionsservice
Zeitungen (zusätzliche Gebühren)
Geldautomat vor Ort
Einrichtungen allgemein
Reinigungsservices
Allergikerfreundliche Zimmer verfügbar
Nichtraucherunterkunft (Alle öffentlichen und privaten Bereiche sind Nichtraucherzonen)
Diese Unterkunft teilen
Familienzimmer (2 Erwachsene + 2 Kinder)
Doppel-/Zweibettzimmer mit eigenem externen WC
Echte Bewertungen von echten Gästen
Mehr als 136 Mio. Bewertungen von Gästen nach ihrem Aufenthalt
Hotelrichtlinien
Abreise
Stornierung / Vorauszahlung
Die Stornierungs- und Vorauszahlungsbedingungen ändern sich je nach Zimmerkategorie. Bitte fügen Sie Ihre Reisedaten ein und überprüfen Sie die Bedingungen Ihrer gewählten Zimmerkategorie.
Folgende Kreditkarten werden akzeptiert
American Express, Visa, Euro/Mastercard, Diners Club, Maestro, Eftpos, UnionPay Kreditkarte, EC-Karte, Reka-Check, Bankkarte, Andere Kreditkarten
Kinder und Zustellbetten
Zustellbetten sind nur auf Anfrage erhältlich und müssen in jedem Fall von der Unterkunft bestätigt werden.
Zusätzliche Kosten sind nicht im Gesamtpreis enthalten und müssen separat während Ihres Aufenthaltes bezahlt werden.
Informationen zu Transportmöglichkeiten
- 600 m Bahnhof
Unterkunft kontaktieren
Sie können besondere Anfragen stellen, nachdem Sie Ihren Preis ausgewählt haben.
Sobald Sie gebucht haben, erhalten Sie die Kontaktinformationen, so dass Sie sich direkt mit der Unterkunft in Verbindung setzen können.
Verfeinern Sie Ihre Unterkunftssuche
Dem Wunschzettel hinzufügen
Gesamtpunktzahl
Gebührenpflichtiges WLAN 5,6
Gebührenpflichtiges WLAN 6,7
Gebührenpflichtiges WLAN 5,4
Gebührenpflichtiges WLAN 6,3
Gebührenpflichtiges WLAN 4,7
Gebührenpflichtiges WLAN 7,5
Die Gästebewertungen drücken die persönliche Meinung der Kunden von Booking.com aus, die nach ihrem Aufenthalt einen Fragebogen ausgefüllt haben. Diese Aussagen müssen nicht mit der Meinung von Booking.com übereinstimmen.
Reisende, die an dieser Unterkunft interessiert sind, haben sich auch folgende angeschaut:
Hotel Restaurant Burestadl
Hotel Tellsplatte
Hotel Krone
Hotel Reiser
Jetzt buchen – IN DER UNTERKUNFT ZAHLEN
KOSTENLOSE Stornierung für die meisten Zimmer
1.534.024 Unterkünfte in 229 Ländern
Hotels, Pensionen, Motels und mehr .
Klicken Sie auf den Link in Ihrer E-Mail und erneuern Sie Ihr Passwort
Geben Sie Ihre E-Mail-Adresse ein und wir senden Ihnen Ihre Buchungsbestätigung erneut zu.
Wir haben die ausgewählten Bestätigungen an gesendet
Leider konnten wir die ausgewählten Bestätigungen nicht erneut senden
Klicken Sie auf den Link in Ihrer E-Mail und erneuern Sie Ihr Passwort
Wenn Sie ein Konto erstellen oder sich anmelden, erklären Sie sich mit unseren AGB und Datenschutzbestimmungen einverstanden.
Echte Gäste • Echte Aufenthalte • Echte Meinungen 136.400.315 echte Gästebewertungen
Wir sind für Sie da 24/7 Online- und telefonischer Kundenservice auf Deutsch und 42 weiteren Sprachen
Garni Rosa Delle Alpi
Garni Rosa Delle Alpi — здесь есть места по ценам от 4 199 руб..
Укажите даты, чтобы не упустить эту отличную цену.


Общая оценка
Соотношение цена/качество 8,2
Бесплатный Wi-Fi 8,1
Соотношение цена/качество 8,3
Бесплатный Wi-Fi 10
Соотношение цена/качество 7,9
Бесплатный Wi-Fi 7,3
Соотношение цена/качество 7,9
Соотношение цена/качество 8,8
Бесплатный Wi-Fi 10
Соотношение цена/качество 9
Бесплатный Wi-Fi 10
Гостевой дом Garni Rosa Delle Alpi занимает традиционное здание 19 века, типичное для региона Тичино, в 200 м от исторического центра Гордолы. К услугам гостей хорошо освещенные номера с бесплатным Wi-Fi и собственная бесплатная парковка.
Парковка
Домашние животные
Питание и напитки
Зоны общественного пользования
Номера для некурящих
Двухместный номер с 1 кроватью
Настоящие отзывы от настоящих гостей
Более 136 миллионов отзывов от гостей после проживания
Порядок проживания в отеле
Отъезд
Отмена бронирования / Предоплата
Правила отмены бронирования и предоплаты зависят от категории номера. Пожалуйста, введите даты проживания и ознакомьтесь с условиями бронирования для требуемого номера.
Домашние животные
Только наличные
Кредитные карты не принимаются/оплата только наличными
Размещение детей и предоставление дополнительных кроватей
Дополнительные кровати и детские кроватки предоставляются по запросу. Требуется подтверждение со стороны отеля о предоставлении данной услуги.
Дополнительные услуги не включаются автоматически в общую стоимость и оплачиваются отдельно во время вашего проживания.
Please note that the city tax includes the Ticino Ticket. It offers free benefits and discounts in the Canton of Ticino, including free use of train and bus services. For more details, please contact the property directly.
Связь с объектом размещения
Специальный запрос можно отправить после того, как вы выберете категорию номера.
Как только вы завершите бронирование, мы предоставим вам контактные данные объекта размещения, чтобы вы смогли связаться с ним напрямую.
Информация о транспорте
- 45 мин. На машине
- Доступна бесплатная парковка.
Интересные места поблизости
- Ближайшие достопримечательности
Посмотреть похожие типы жилья
Добавить в список
Общая оценка
Соотношение цена/качество 8,2
Бесплатный Wi-Fi 8,1
Соотношение цена/качество 8,3
Бесплатный Wi-Fi 10
Соотношение цена/качество 7,9
Бесплатный Wi-Fi 7,3
Соотношение цена/качество 7,9
Соотношение цена/качество 8,8
Бесплатный Wi-Fi 10
Соотношение цена/качество 9
Бесплатный Wi-Fi 10
Отзывы гостей отражают личное мнение клиентов Booking.com, ответивших на вопросы анкеты после проживания в отеле. Данные суждения могут не совпадать с мнением Booking.com.
Пользователи, которых интересует этот вариант, также смотрели:
Hotel dell'Angelo
Osteria Ticino
ibis Locarno
Hotel San Bernardo
Бронируйте сейчас, ПЛАТИТЕ НА МЕСТЕ
БЕСПЛАТНАЯ отмена бронирования для большинства вариантов
1 534 024 вариантов размещения в 229 странах
Отели, гостевые дома, мотели и многое другое…
Электронное сообщение отправлено
Пожалуйста, проверьте свою электронную почту и перейдите по ссылке для восстановления пароля
Укажите ваш адрес электронной почты, и мы вышлем ваше подтверждение бронирования еще раз
Мы отправили запрошенные вами бронирования по адресу:
К сожалению, нам не удалось отправить вам запрошенные бронирования
Электронное сообщение отправлено
Пожалуйста, проверьте свою электронную почту и перейдите по ссылке для восстановления пароля
Создавая аккаунт или заходя в него, вы соглашаетесь с нашими Правилами и условиями и Положением о конфиденциальности
Настоящие гости • Настоящие поездки • Настоящие мнения 136 400 315 проверенных отзывов
Все, что нужно для путешествий Круглосуточная поддержка на сайте и по телефону На русском и 42 других языках
Понятная экономия Бронирование без комиссии • Регулярные специальные предложения • Мы возвращаем разницу в цене
Rustico Brötchen, Lidl
Kalorien und Nährwerte pro Portion
Wie viele Kalorien solltest du zu dir nehmen?
Wie verbrennst du 125 Kalorien?
Zusammensetzung der Kalorien
Katharina, 25
Ich konnte und wollte nicht glauben oder wahrhaben, dass das auf den Bildern ich sein sollte. Vor dem Entschluss, mein Leben und meine Essgewohnheiten zu ändern, war ich träge, faul, unsportlich und habe mich größtenteils von Fertig- und Tiefkühlprodukten ernährt.
Sebastian, 31
Eigentlich wollte ich nur etwas gegen diese lästigen Rückenschmerzen tun. Dann packte mich der Ehrgeiz gut aussehen zu wollen und dies war nun mein Ziel: Gutes Aussehen, Kilos verlieren, sportlicher und fitter werden.
Monique, 30
Nach ein paar Bildern habe ich ein Foto von mir gesehen, was mich selbst so sehr erschrocken hat. Ich habe zuvor nie an mir gearbeitet und auch nicht darauf geachtet, wie ich aussehe und mich fühle. Mir war das alles egal, wenn mich jemand darauf angesprochen hat.
veröffentlicht in der Kategorie "Verschiedenes"
veröffentlicht in der Kategorie "Knabbergebäck"
veröffentlicht in der Kategorie "Brot"
veröffentlicht in der Kategorie "Saucen & Dressing"
veröffentlicht in der Kategorie "Pasta Gerichte"
veröffentlicht in der Kategorie "Brot"
veröffentlicht in der Kategorie "Pizza"
veröffentlicht in der Kategorie "Brot"
veröffentlicht in der Kategorie "Saucen & Dressing"
veröffentlicht in der Kategorie "Brot"
Das Produkt "Rustico Brötchen, Lidl" aus der Kalorientabelle Brot, Brötchen & Backwaren enthält je 100 g einen Energiewert von 250,0 Kilokalorien. Mit diesem Energiewert verfügt das Lebensmittel über eine sehr hohe Kaloriendichte. Da Nahrungsmittel mit einem Energiewert von mehr als 250 Kalorien pro 100 g nur noch wenig Wasser, sondern größtenteils Kohlenhydrate und Fett enthalten, solltest du dieses Nahrungsmittel nur in geringen Mengen essen. Zusätzlich zeigen wir für das Lebensmittel "Rustico Brötchen, Lidl", wie lange du z.B. Spazieren gehen müsstest, um die gegessenen Kalorien wieder abzubauen. Auch der jeweilige Anteil am empfohlenen Bedarf für die Kilokalorien und Nährstoffe für jede Portion werden dir berechnet. Des Weiteren verraten wir dir, ob es sich um ein schlechtes Nahrungsmittel handelt und berechnen für das Nahrungsmittel "Rustico Brötchen, Lidl" aus der Produktkategorie "Brot, Brötchen & Backwaren" den enthaltenen Prozentsatz an Eiweiß, Fett und Kohlenhydraten. Weitere Informationen über die Mineralstoffe und Vitamine für "Rustico Brötchen, Lidl" siehst du in der Kalorientabelle oberhalb. Das Produkt gehört mit 1,0 g Nahrungsfett auf 100 g zu den relativ fettarmen Produkten, da es nur einen niedrigen Anteil an Fetten enthält. Auch während einer Diät, solltest du etwa 25 bis 30 Prozent deiner Energiezufuhr durch Fette zu dir führen. Außerdem enthält dieses Produkt mit 51,5 Gramm einen großen Prozentsatz an Kohlenhydraten und ist damit nicht für eine vollwertige Mischkost zu empfehlen. Wir empfehlen dir, dass du nur bis zu 50% deiner Energiezufuhr durch Kohlenhydrate aufnimmst. Der Gehalt an Eiweißen beträgt 8,5 g. Damit besitzt "Rustico Brötchen, Lidl" nur einen sehr niedrigen Gehalt an Eiweißen.
Das Nahrungsmittel "Rustico Brötchen, Lidl" ist einsortiert in der Kalorientabelle Brot, Brötchen & Backwaren. Die Nährwerte für das Lebensmittel wurden am 04.04.2013 erhoben. Das letzte mal wurden die Nährwertinformationen am 04.04.2013 aktualisiert. Die Nährwertangaben wurden durch YAZIO Nutzer auf Grundlage der Nährwertinformationen der Lebensmittelverpackung eingetragen oder kommen direkt vom Hersteller Lidl. Bitte beachte, dass wir keine Gewähr für die Richtigkeit der Nährwertangaben übernehmen. Bitte nutze die vorliegenden Infos nicht als ausschließliche Grundlage für ernährungsrelevante Entscheidungen. Für zusätzliche Informationen über das Produkt informiere dich beim Hersteller aus der Kalorientabelle Lidl.
Ein glutenfreier Blog
Ein Blog für alle Gluten-Allergiker/Zöliakie Patienten. Glutenfrei Einkaufen, Reisen, Kochen & Backen!
Freitag, 28. August 2009
glutenfreie Produkte aus der DM Drogerie
Bis vor kurzem konnte man auf der DM Homepage aus einer Art "Allergiker-Suchmaschine" zwischen 7 Kategorien wählen und man hat die jeweiligen Produte aufgelistet bekommen:
Alnavit Apfel Zimt Riegel 3x40g
Alnavit Gemüsebrühe 165g
Alnavit Buchweizenbrot mit Sesam 250g
Alnavit Knusper Brot 200g
Alnavit Reisbrot 375g
Alnavit Toastbrot 350g
Alnavit Vollkornbrot 400g
Alnavit Fruchtriegel Kokos 40g
Alnavit Nussecken 110g
Alnavit Mandelhörnchen 150g
Alnavit 3-Korn-Puffer 160g
Alnavit Hirsebrot mit Leinsamen 250g
Alnavit Knusperbrot Mais + Reis 150g
Alnavit Rustikales Knäckebrot 200g
Alnavit Schokomüsli 600g
Schär Bon Matin Hefebrötchen 200g
Schär Ciabatta Aufbackbrötchen 200g
Schär Ciabatta Rustica Aufbackbrötchen 200g
Schär Croccanti Knusp.Brot 150g
Schär Landbrot geschnitten 320g
Schär Mehlmischung Mix B 1000g
Schär Mehlmischung Mix C 1000g
Schär Pan Carre Toastbrot glutenfrei 2x200g
Schär Panini Brötchen 200g
Schär Pasta Fusilli 500g
Schär Pasta Spaghetti 500g
Schär Pepitas Kekse 200g
Schär Minitörtchen Pausa Ciok 35g
Schär Petit Butterkeks 150g
Schär Orangino Softcake 150g
Schär Zwieback 165g
Schär Rustico Mehrkornbrot geschnitten 2x200g
Schär Salinis Salzbrezeln glutenfrei 60g
Schär Crisp rolls 150g
Schär Mehl 1000g
Schär Brotmix dunkel 500g
Schär Pasta Rigati 500g
Schär Wafer Pocket 50g
Schär Snack Schokoriegel 3x35g
Schär Solena Müsliriegel 25g
Schär Sorrisi Kekse 175g
Schär Sunna Vollkornbrötchen 200g
0 Kommentare:
Kommentar veröffentlichen


- ► 2017 (52)
- ► November (5)
- ► Oktober (2)
- ► September (7)
- ► August (4)
- ► Juli (7)
- ► Juni (7)
- ► Mai (2)
- ► April (3)
- ► März (5)
- ► Februar (7)
- ► Januar (3)
- ► 2016 (84)
- ► Dezember (12)
- ► November (11)
- ► Oktober (6)
- ► September (4)
- ► August (12)
- ► Juli (5)
- ► Juni (6)
- ► Mai (7)
- ► April (3)
- ► März (9)
- ► Februar (7)
- ► Januar (2)
- ► 2015 (60)
- ► Dezember (3)
- ► November (8)
- ► Oktober (9)
- ► September (6)
- ► August (2)
- ► Juli (6)
- ► Juni (2)
- ► Mai (3)
- ► April (2)
- ► März (4)
- ► Februar (4)
- ► Januar (11)
- ► 2014 (81)
- ► Dezember (5)
- ► November (4)
- ► Oktober (14)
- ► September (7)
- ► August (6)
- ► Juli (6)
- ► Juni (6)
- ► Mai (4)
- ► April (7)
- ► März (4)
- ► Februar (8)
- ► Januar (10)
- ► 2013 (108)
- ► Dezember (8)
- ► November (9)
- ► Oktober (9)
- ► September (5)
- ► August (6)
- ► Juli (7)
- ► Juni (11)
- ► Mai (10)
- ► April (10)
- ► März (11)
- ► Februar (11)
- ► Januar (11)
- ► 2012 (91)
- ► Dezember (14)
- ► November (13)
- ► Oktober (9)
- ► September (8)
- ► August (3)
- ► Juli (8)
- ► Juni (6)
- ► Mai (6)
- ► April (5)
- ► März (8)
- ► Februar (4)
- ► Januar (7)
- ► 2011 (119)
- ► Dezember (9)
- ► November (8)
- ► Oktober (12)
- ► September (11)
- ► August (3)
- ► Juli (8)
- ► Juni (9)
- ► Mai (10)
- ► April (9)
- ► März (11)
- ► Februar (10)
- ► Januar (19)
- ► 2010 (168)
- ► Dezember (8)
- ► November (13)
- ► Oktober (9)
- ► September (8)
- ► August (12)
- ► Juli (7)
- ► Juni (11)
- ► Mai (9)
- ► April (34)
- ► März (27)
- ► Februar (17)
- ► Januar (13)
- ▼ 2009 (103)
- ► Dezember (21)
- ► November (25)
- ► Oktober (18)
- ► September (7)
- ▼ August (6)
- glutenfreie Produkte aus der DM Drogerie
- Fiensmecker Grillsaucen
- Glutenfrei in Thailand
- Betty Crocker macht GLUTENFREI
- Albaöl - mein kleiner Geheimtipp!
- Glutenfreies von Gutfried
- ► Juli (26)
- ► 2008 (2)
- ► Juli (1)
- ► Juni (1)

Beruht auf einem Inhalt unter www.gluten-frei.net.
Beliebte Posts


Keines der Produkte wird von mir als glutenfrei vorgestellt wenn es nicht ausdrücklich auf der Verpackung oder Hersteller Homepage als solches gekennzeichnet ist.
Dennoch ändern sich Rezepturen dauernd und auch die Gefahr von Kreuzkontamination nie auszuschließen ist, sollte man immer auf Nummer sicher gehen und ggfs. den Hersteller selbst kontaktieren.
Copyright 2010-2017 Ein glutenfreier Blog All rights reserved.
Recipe wanted for soft multigrain sandwich bread

Recipe wanted for soft multigrain sandwich bread
My daughter is asking me to bake a fiber-rich sandwich bread that has the mouth feel and texture of soft, commercial breads, e.g., Aunt Millie's, Klosterman, Butternut. Like many of her generation, she favors soft crumb to the rougher, more substantial artisanal bread. I searched here but found mostly hard-crusted breads. Does anyone have what I'm looking for? --- cake diva
- Log in or register to post comments
- Printer-friendly version

Try the Multigrain Extraordinaire in Reinhart's BBA on page 187. It's incredible. It also makes really good dinner rolls. I make mine with 80% prefermented dough, but it's also really good if you make it without a preferment. It is pretty soft bread but really flavorful. Also, like Reinhart says, it makes unbelievable toast--and I never even liked toast before.
- Log in or register to post comments
Here's the formula I use. I hesitate to post it because it is mostly Reinhart's, but with my changes I guess it's not completely flagrant copyright violation. Numbers are in oz. and are for for 3 lbs. of dough. Hold back some of the water in the final mix until you see if it needs more. It sometimes seems a little too wet with the full amount of water to me.
- Log in or register to post comments

I'll copy the above into excel so I can figure out batch size. Can you give me short instruction on how to make? I don't have BBA. I've restrained myself from buying books because we might have to move. But I've gotten so much better since Art 1!
- Log in or register to post comments
The night before:
Mix the soaker ingredients. Leave at room temp overnight in a covered container
Mix the prefermented dough ingredients thoroughly and ferment at room temp for about an hour. Then store in the frig overnight. The amount of yeast in the pref. dough is maybe around 3/8 teaspoon.
In the morning, bring pref. dough to room temp and then mix every thing together in a mixer until it will just pass the window test (improved mix). The dough temp should be about 77-80. Ferment at 75 F for 1.5 hours. If dough seems to slack you can fold it 1-2 times during fermentation.
Divide into sizes and shapes you want. I normally make 2 or 3 oz. boules than turn into nice dinner rolls. 3-4 oz. boules will give you approximately hamburger bun size rolls. If you make rolls put them on parchment on a sheet pan with room to expand. I usually put 9-12 on a half sheet pan. You can also shape it for loaf pans as described in most any book on bread.
I find that folding the dough during fermentation to build strength and shaping tightly gives nice round rolls that hold their shape. To get hamburger buns I don't make the dough as strong and shape more loosely so it will spread out into hamburger bun shape during proofing. I think this bread makes better rolls and pullman style loaves than hamburger buns because it is a little too sweet (for my taste) for hamburgers.
Optionally eggwash and sprinkle with bran or sesame seeds or whatever you like. I generally sprinkle with coarse bran.
Proof for 1.5 hrs or until about doubled in volume.
For 2 oz. rolls I bake at 350 F for about 20 min. Turn pan end-for-end halfway through the bake for even baking. I use steam at the start of baking.
For loaf pans you'll need to bake longer. maybe up to 30-40 mins. Reinhart calls for an internal temp of about 190 or you can do the "thump on the bottom test" to detemine if the loaves are done.
Reinhart's formula is for a 2 lb. loaf. Using my numbers you could make 2 1.5 pound loaves or increase/decrease the amounts to suit your needs and the size of your loaf pans.
Here's what they look like:

Here are the even briefer SFBI-style directions:
I have all this in a spreadsheet. Let me know if you want and I can email it to you.
- Log in or register to post comments
Hello, Cake Diva,
I am new to this forum and new to artisan breads, but I have been baking soft pan loaves for over 50 years. I have been gleaning all the tips I can find for crusty white breads and am happy that i can contribute something. I hope you will give this bread a try. I gave a loaf, fresh from the oven, to a new neighbor as a welcome gift. The hubby came to tell me it was the most delicious bread he had ever eaten and he always thought he didn't like whole grains.
Here is my own recipe that I have been using for years and raised my 4 children on. It has gone through many transitions as I change the wheat I use and/or find better ways to make it tasty. I stone grind my own flour and, although, I have used hard red wheat for many years, I have recently started using the hard white wheat from Wheat Montana Farms. It is over 16% protein which makes it a nice high gluten flour. The cooked oatmeal makes it very moist and keeps well. It is wonderful breakfast toast and, sliced thinner, is great for sandwiches.
Note that the measurements are not precisely weighed out as in the artisanal breads. It is an old fashioned homey bread and, depending on the humidity of the day, it may take a bit more or less flour. I make this in a batch of 4 loaves at a time, but I have reduced the recipe to 2 loaves here. You may be able to knead it completely in your Kitchen Aid Mixer, but with my large batch, I start with the mixer and go on to hand kneading. I like hand kneading anyway and find it very therapeutic and satisfying. *Please note that my 4 loaf batch has evolved into 5 loaves. I think it is the addition of the oatmeal and the extra grains. Your 2 loaf batch might fill your pans a bit generously or you may prefer to make a little loaf or a couple rolls if it seems like too much.
Whole Wheat Honey Oat Bread -- 2 two pound loaves.
1 1/2 cups water
1/4 teaspoon salt
1/2 cup oats (rolled or steel cut)
1. Bring water and salt to a boil. Stir in the oats and return to a boil. Simmer until tender. This may take about 5 minutes for rolled oats. Steel cut oats take longer. Taste a bit to check tenderness. You don’t want to break your teeth on the oats.
Leave the cooked oats aside to cool.
*You can add 1/2 cup finely ground alfalfa or flax seeds or any other grain you like and cook it with the oats. I like my grains finely ground and softened because I do not care for "grainy" breads. I grind the small amount of seeds in an electric blade type coffee grinder that I keep for this purpose. I grind them just before using.
2 Tablespoons sugar (or you may use all honey or all sugar)
2 1/2 cups tepid water
2 Tablespoons active dry yeast
2. Stir sweetener into water in a separate medium bowl. Sprinkle the yeast into the warmed bowl you will use to mix the dough. Slowly pour the sweetened warm water over the yeast, but do not stir. Keep it warm. Set aside to foam up (proof). (8-10 min).
8 cups total flour -- whole wheat high protein bread flour (My flour is 16% protein). I brind my flour just before baking. If you grind and do not bake the same day, the flour should be aged at least 2 weeks before baking.
Measure out about 4 cups of the above flour.
1 tablespoons salt
1 Tablespoon lecithin if you have it (liquid or granular)--Optional. This helps keep cholesterol under control and I add it to most of my baked goods. It is not necessary for the success of the bread.
(-Optional: 2 Tablespoons Vital Wheat Gluten _Add this is your flour is not high protein/high gluten.)
3. Add oil, salt, gluten, lecithin (optional) and 2 cups of the flour to foamy yeast mixture. Stir and beat about 300 strokes by hand or 3 minutes by mixer at medium speed. Add enough more flour to make a soft dough. Stop with the mixer before it starts to climb up the beaters. Now use a large wooden spoon or flat stirrer until it is stiff enough to scrape it out onto a floured surface to knead in the rest of the flour in by hand.
4. Turn out onto a board (or a formica table top) and knead the remaining flour into the dough until dough is elastic and not sticky. -- No less than 7-8 minutes -- the more you knead here, the better the bread!
You may use slightly less or more than the remaining 6 cups of flour, so have an additional cup or two ready in reserve for kneading, if needed. Actual amount of flour varies with humidity, etc.
5. Place dough in oiled bowl; turn it over to oil top of dough, cover with a warm damp cloth and place in a warm place free of drafts to rise. (30-40 minutes). While dough is rising, generously grease 4 loaf pans.
6. Punch down dough and dump it out of the bowl. Knead lightly, cut into 4 evenly sized pieces. (I weigh mine--2 pounds.) Cover with a damp cloth and let them rest 10-15 minutes. Shape into loaves and put into the well greased pans. Place in well greased bread tin, oil the top of loaf, cover with damp cloth or plastic wrap. Put back into the warm place to rise till double in bulk (30-45 minutes).
7. When bread is nearly risen, preheat the oven to 350’. If you have been using the oven for a rising spot, be sure to take the loaves out before turning the oven on! Brushing tops with egg white before baking makes a lovely brown top. Sprinkle tops with poppy or sesame seed, if desired.
Place them in another warm spot while oven heats up. Bake about 45 minutes at 350’ F.
- Log in or register to post comments
Thank you for taking the time to write the recipes and instructions. I'll make these into pan loaves. I think I'll add a few cut walnuts too for some nutty flavor. Thank you, thank you! --- cake diva
- Log in or register to post comments
Here is a photo of my Whole Wheat Honey Oatmeal Bread. There are a couple slices missing because we had it for breakfast. When I bake 4 loaves, I keep one out and put the others in the freezer so there is always fresh bread when we want it.
It's a bit sweet and I love it with just butter. My granddaughter and my DH like homemade apple butter on it. It makes the absolute best grilled cheese sandwiches, but good for cold sandwiches, too.

- Log in or register to post comments
I forgot to mention that the loaf in the photo is a much darker brown because I substituted blackstrap molasses for the honey this time just to see how it would come out. Usually the lighter wheat flour makes a very light tan bread. So, unless you plan to use dark molasses, expect a lighter colored loaf. Red wheat will also make it darker than the white wheat. I like playing around for variety.
- Log in or register to post comments
My husband likes the commercial Milton brand multi-grain loaf, which is soft, sweet, and has a nice complex flavor.
I find the KAF multigrain loaf (search KAF recipes since the spam filter on this site doesn't like the link) is a close approximation--better IMHO because it is not quite as sweet. It uses mostly ingredients you are likely to have on hand. I substitute rye flour for the pumpernickel and use vital wheat gluten in place of KA "dough enhancer". I also add 4.2 oz of 100% hydration ripe sourdough starter to improve the keeping qualities of this bread.
I make this bread weekly (when it isn't so dang-blasted hot!), slice and freeze the slices. Even my teen who has vowed never to touch a whole grain will eat this when nobody is looking.
- Log in or register to post comments
User login
Navigation
Recent Forum Posts
Bread Books
Also on TFL


Follow The Fresh Loaf on:
All original site content copyright 2017 The Fresh Loaf unless stated otherwise. Content posted by community members is their own. The Fresh Loaf is not responsible for community member content. If you see anything inappropriate on the site or have any questions, contact me at floydm at thefreshloaf dot com. This site is powered by Drupal and Mollom.
Deshalb duftet Ihr Supermarkt nach frisch gebackenem Brot

Panini Rustico
Panini Rustico ist ein längliches, rustikales Baguettebrötchen mit geradem Schnitt, das zu den Enden spitz zuläuft. Es ist nach dem Backen zartsplittrig und langanhaltend krosch mit einer weichen, saftigen Krume.
Verkehrsbezeichnung:
WEIZENmehl, Wasser, HartWEIZENgrieß, Salz, Erläuterung:Backhefe besteht aus einzelligen Kleinstorganismen, auch Hefepilze genannt. Sie vergärt Stärke und Zucker. Dabei entsteht unter anderem das Gas Kohlendioxid, das dem Teig Volumen gibt.
1) pflanzlicher Ursprung
Kann Spuren von SESAM enthalten.
Wichtige Informationen zu Zutaten und Allergenen:
Nährwertinformationen:
* Referenzmenge für einen durchschnittlichen Erwachsenen (8400 kJ/2000 kcal).
1 Brötchen (ca. 75 g) = 1 Portion.
Das könnte Ihnen auch schmecken:

Kürbiskern
Weizenmischbrot mit 31 % Weizenmehl und 9 % Kürbiskernen Im Kasten gebackenes Weizenmischbrot mit Kürbiskernen.

Weltmeister - Mehrkornbrot
Mehrkornbrot Saftiges Mehrkornbrot aus Weizen, Roggen und Hafer.

Vollkornbrot Saftiges Vollkornbrot, mit Natursauerteig gebacken.
TEFAL AVANTI - VERSION 2002 Manual
Related Manuals for TEFAL AVANTI - VERSION 2002
Summary of Contents for TEFAL AVANTI - VERSION 2002
Avanti Europe 2002.qxd 09/10/2002 12:33 Page 1 . .
Avanti Europe 2002.qxd 09/10/2002 12:33 Page 2 H I - L I F 4 - 5 - 6.
• Unwind the supply cord completely. You can shorten the length of the cord by loosely • If the appliance is to be used in a country other wrapping it once around the pegs at the bottom than that of purchase, it should be checked by an of the toaster.
1 automatically selected. to 6. Lower the bread into the toaster, and press • At the end of the cycle, the bread will pop up and the «frozen» button. the toaster switches off.
• To move the toaster, a carrying handle is located as this could damage the heating elements. behind the appliance. - Fig. 8 • To clean the exterior and the cord, wipe it down with a damp cloth. Let it dry before using it again. «Subject to modifications !».
• Always plug the toaster into an earthed socket effect, and with the following directives • Do not let the cord hang and keep out of reach of children. Do not leave the cord in contact with the warm parts of the •.
Page 7 Wiring Instructions (for U.K. only) WARNING : All appliances must be earthed Important : The wires in this lead are coloured in accordance with the following codes : Brown Green and Green and Yellow : Earth yellow or.
Mode d’emploi - Fig. 1 et 2 • Votre grille pain permet de griller tous les pains : • Le grille pain est équipé d’une manette de baguette, pain de mie, pain de campagne, pain surélévation pour saisir plus facilement le pain.
Modèle «DELUXE» • Fonctions spécifiques - Fig. 4 Réchauffage / Reheat • Pour réchauffer des toasts (temps fixe, court), • A la fin du cycle, le pain est mis à disposition, le abaissez le bouton de commande du grille-pain, grille-pain cesse de fonctionner.
Javel. débris qui peuvent rester entre les éléments • Ne pas enrouler le cordon autour du corps de chauffants. Il est recomandé de nettoyer le l’appareil. Un range-cordon est situé sous plateau ramasse-miettes régulièrement.
• Compte-tenu de la diversité des normes en vigueur, si cet • Afin d’éviter les chocs électriques, ne plongez jamais le fil appareil est utilisé dans un pays différent de celui où il a été électrique, la prise de courant ou l’appareil dans l’eau ou un acheté, faites-le vérifier par une station service agréée.
• Vor der ersten Benutzung den Einstellknopf auf anschalten. Dies beseitigt die unangenehme die kleinste Position stellen. Geruchsbildung bei Neugeräten. • Bei der ersten Benutzung den Toaster ohne Brot Gebrauchsanweisung - Abb. 1 und 2 • In diesem Toaster können alle Brotsorten •.
Bedienungshebel des Toasters herunterdrücken hochgehoben, und der Toaster schaltet und auf die Taste «Aufknuspern / Reheat» drücken. automatisch ab. • Das Gerät funktioniert dann für kurze Zeit bei beliebiger Position des Einstellknopfes zwischen 1 und 6. Auftauen / Frozen • Für das Toasten von tiefgefrorenem Brot den •.
• Die Brötchen, Croissants, usw. auf das Gitter legen. Vorsichtsmaßnahmen : • Brötchen oder Croissants niemals direkt auf die • Das Gerät darf nicht für das gleichzeitige Toasten obere Öffnung des Geräts legen. von Brotscheiben und das Aufbacken von Brötchen benutzt werden.
Gebrauch ist. • Benutzen Sie das Gerät nicht als Wärmequelle. • Benutzen Sie eine stabile Arbeitsfläche, die vor • Da Brot auch brennbar ist, darf das Gerät nicht in der Nähe Wasserspritzern geschützt ist. von brennbaren Materialien wie Gardinen, Regalen, Möbeln •.
• De thermostaatknop met 6 standen bevindt zich Het gebruik van de broodrooster • Controleer voor gebruik of de broodkruimelklep aan • Rol het snoer volledig uit en steek de stekker in de onderzijde goed vergrendeld is. (zie Fig. 6) het stopcontact.
• Voor het roosteren van diepgevroren brood, eerst • De roostertijd wordt nu automatisch enigszins de gewenste bruiningsgraad kiezen verlengd. (thermostaatstand 1-6), het brood laten zakken • Als het brood klaar is komt het omhoog en en vervolgens de toets indrukken. schakelt het apparaat uit. Handmatig uitschakelen •.
Page 18 Schoonmaken - Fig. 6, 7 en 8 • Voor elke schoonmaak- en onderhoudsbeurt de • De buitenkant van de broodrooster en het snoer stekker uit het stopcontact halen en het apparaat met een vochtig doekje afnemen en afdrogen.
Bij het gebruik van elektrische apparaten is het van belang, een aantal elementaire voorzorgsmaatregelen in acht te nemen, en wel in het bijzonder deze : • Lees de handleiding volledig en aandachtig en volg de daarin •.
ønskede position : Termostatindstillingen nedsættes når De ikke udfylder hele brødristeren. 1 - 2 svagt ristet, 3 let ristet, 4 - 5 godt ristet, 6 meget ristet Placering af brødet - Fig. 3 • Stil skiverne ved siden af hinanden foroven fra indstillingsknappen.
• Placér holderen til små brød . • Når ristningen er færdig, lad apparatet afkøle og træk stikket ud. • Indstil til den ønskede position (knap 3) fra 1 til 3 højest. • Stil de små brød , horn osv på tråden.
• Undgå at rulle ledningen omkring brødristeren. - for krummer. Tøm krummebakken Fig. 7 regelmæssigt. - Fig. 6 • Et håndtag til at bære findes bagpå apparatet. - • Brug aldrig metalgenstande til rensning, det kan Fig. 8 ødelægge brødristeren.
• Hvis ledningen er defekt. • Lad aldrig apparatet være tændt uden overvågning, specielt • Hvis apparatet er faldet på gulvet, og der er synlige tegn på, ved brug første gang, eller når indstillingerne ændres. at det er beskadiget, eller hvis det ikke fungerer rigtigt. I så.
• Avviate il tostafette, facendolo funzionare a vuoto Modalità d’impiego - Fig. 1 e 2 • Il vostro tostafette permette di tostare tutti i tipi di • Il tostafette è dotato del sistema Hi-lift: le fette di pane: filoncini, pane in cassetta, pane rustico, pane vengono sollevate molto in alto per poterle pane congelato.
• L’apparecchio funzionerà per un tempo breve, qualsiasi sia la posizione del pulsante di regolazione. Scongelamento / Frozen • Per tostare dei toast congelati, regolate tra 1 e 6 • Verrà selezionato automaticamente un tempo di il livello di tostatura desiderato in funzione del tostatura supplementare.
Avanti Europe 2002.qxd 09/10/2002 12:38 Page 26 Manutenzione e pulizia - Fig. 6, 7 e 8 • Prima di qualsiasi manipolazione, scollegate e • Non usate prodotti detergenti troppo aggressivi o lasciate raffreddare l’apparecchio. abrasivi, prodotti per forni o candeggina.
• Utilizzare solo ed esclusivamente delle prolunghe in buono stato acquistato, è necessario farlo previamente controllare stato, munite di una spina con messa a terra e di un filo da un centro assistenza tecnica autorizzato. conduttore avente una sezione come minimo uguale a quella •.
7 Asa de transporte (parte posterior del 4 Botón de recalentamiento (según el modelo) aparato) Antes de la primera utilización • Sacar el aparato de su embalaje y retirar todas un centro de servicio autorizado. las pegatinas. • Leer el modo de empleo y seguir •.
Modelo «DELUXE» • Funciones específicas - Fig. 4 Recalentar / Reheat • Para recalentar tostadas (tiempo fijo, corto), • Al final del ciclo, el pan sale y el tostador deja de presionar el mando del tostador y pulsar el funcionar.
• El transporte del aparato se puede efectuar objeto metálico, ya que podría deteriorarlo. fácilmente gracias al asa situada en la parte • Limpiar el exterior del aparato y el cable con un posterior del aparato. - Fig. 8 «Salvo modificaciones».
CONSIGNAS DE SEGURIDAD Prevención de los accidentes domésticos : • La seguridad de este aparato está en conformidad con las • No deje que el cable cuelgue o toque las partes calientes del reglas técnicas y las normas vigentes. aparato.
• Desembalar o aparelho e retirar todos os auto- aparelho a um centro de serviço de reparações. colantes. • Ler o modo de emprego e seguir as instruções • A embalagem da sua torradeira é reciclável, mas de utilização atentamente.
Modelo «DELUXE» • Funções específicas - Ilus. 4 Aquecimento / Reaquecimento • Para voltar a aquecer as fatias de pão torrado, • No final da operação, o pão sobe e a torradeira baixe o botão de comando da torradeira e apoie deixa de funcionar.
• Não enrolar o fio em volta do corpo do aparelho. saiam do aparelho. Recomenda-se que se Existe uma arrumação para o fio na parte inferior limpe regularmente a bandeja de recolha do aparelho.
INSTRUÇÕES DE SEGURANÇA Prevenção de acidentes domésticos : • A segurança deste aparelho está conforme as regras • Não deixe que o fio fique pendurado ou toque as partes técnicas e as normas em vigor. quentes do aparelho. • Directiva de Compatibilidade Electromagnética 89/336/CEE •.
: • Alet kızgın iken ekmekler daha çabuk kızarır, bu • Ekme in tazeli i ve yapısı - bir/iki günden daha durumda kademeyi azaltabilirsiniz. bayat ise kademe dü ük olmalıdır, çünkü bayat • Aletin içine birden fazla dilim koyacaksanız ekmek daha çabuk kızarır.
ı indirin, ve «uçların bakımı ve ayarlanır. temizlenmesi» bölümünü okuyun. • Elektronik modellerde, yerle tirme kolu sadece aletin fi i prize takılı iken ve alt konumda iken kilitlenir. Kızartma leminin Durması • Ekmekler kızardıktan sonra yerle tirme kolu yukarı.
• Aleti asla dondurulmu yemekleri ısıtmak veya eritmek için kullanmayın. Bakım ve Temizleme - ( ekil 6, 7 ve 8) • Kızartma makinesini temizlemek için kırıntı • Aleti temizlemek için deterjan, bula ık teli, tel tepsisini açın ve bezle silin. Sonra aleti ters fırça, a ındırıcı.
89/336 No’lu • Cihazın prizini kordonundan çekerek çıkarmayınız. yönetmeli i. • Sadece toprak prizli, en az cihaz kordonu kalınlı ında ve • Avrupa Birli i’nin 93/68 No’lu yönetmeli i ile iyi çalı ır durumda bir uzatma kordonu kullanınız.
Page 41
Page 43
• Les bruksanvisningen og følg instruksjonene • Emballasjen til dette apparatet kan resirkuleres, nøye. men det kan også være nyttig å ha til innsending Første gangs bruk • Ved første gangs bruk, sett termostatknappen på unngår du den ubehagelige lukten ved et nytt minimum.
. Brødet strømstøt. heves automatisk. Dette gjøres hvis du for • Hvis du rister brød med rosiner, ta disse ut først eksempel har valgt feil ristningsgrad eller hvis da de risikerer å sette seg fast og dermed kan brødet blir for mye ristet.
- Fig. 6 • Det finnes et håndtak på baksiden av apparatet • Bruk aldri metallredskaper inne i apparatet, da som gjør det enklere å flytte på det. - Fig. 8 dette kan ødelegge det. «Med forbehold om modifikasjoner».
* dersom • For å unngå elektrisk støt må du aldri senke kabelen, du skal bruke det i et annet land enn der det er fremstilt. støpselet eller apparatet ned i vann eller annen væske.
Käyttöohje - Kuvat 1 ja 2 • Paahtimeesi sopii erinomaisesti vakiokokoinen, • Paahdin nostaa valmiin leivän ylös, joten se on valmiiksi viipaloitu paahtoleipä, tuore tai pakastettu helppo poistaa koneesta. Kun paahtaminen on leipä. Siihen mahtuvat myös patongit, teeleivät, päättynyt (vipu ylhäällä.
12:42 Page 49 SUOMI Leivän paahtaminen : • Täytä paahdin, paina alas paahtokomentokytkin • Kun laitetta on käytetty kauan, murut ja pöly niin, että se jää ala-asentoon, paahtaminen saattavat tukkia lukitussysteemin. Tämän alkaa. Grillin metalliosat mukautuvat korjaamiseksi paina vain alas automaattisesti leipäviipaleiden paksuuteen.
• Paina alas paahtokomentonäppäin, joka on sähköverkkoon. laitteen vasemmalla puolella. • Asenna sämpylänpidike paikalleen (etu- ja • Sämpylät (sarvet ym.) ovat valmiit, kun kytkin on takapidike). noussut ylös. • Asenna paahtoaika (näppäin 3) haluttuun • Anna paahtimen jäähtyä käytön jälkeen ja ota asentoon (1-3 max.).
• Älä koske metalliosia tai laitteen kuumia pintoja silloin, kun se • Tarkista, että verkkojännite vastaa laitteessa ilmoitettua on toiminnassa. Varoita muita käyttäjiä. jännitettä (vain vaihtovirta).
• Efter att ha använt brödrosten ett antal gånger lär du dig vilken nivå som är bäst för varje tillfälle. • Om du rostar två skivor bröd måste de vara av samma sort, tjocklek och storlek annars bränns Rostningsgraden kan varieras beroende på.
• Om brödet fastnar i brödrosten, dra ur sladden funktion som gör att du med ett enkelt handgrepp och låt apparaten svalna. Ta sedan försiktigt bort kan skjuta upp brödskivorna så att de är lätta att brödet utan att röra värmeelementen. (Använd komma åt.
- Bild 6 under brödrosten. - Bild 7 • Stoppa inte ned något hårt eller vasst föremål i • Finns handtag på baksidan. - Bild 8 brödrosten eftersom det kan skada värmeelementen.
Koppla ur apparaten och kväv elden med en fuktig duk. • Om bröd kommer i kläm i springorna vid rostning eller om de värmande elementen inte stängs av skall man snabbt dra ur • Förvara inte eldfarliga ämnen i närheten av eller under den kontakten från eluttaget och låta apparaten svalna helt innan.
Page 57
Page 59
Avanti Europe 2002.qxd 09/10/2002 12:44 Page 60.
Avanti Europe 2002.qxd 09/10/2002 12:44 Page 61.
Avanti Europe 2002.qxd 09/10/2002 12:45 Page 62.
Avanti Europe 2002.qxd 09/10/2002 12:45 Page 63.
Комментариев нет:
Отправить комментарий